Qt基础控件ToolButton按钮设置图标的方法scrollArea滚动区域使用QLabel标签添加图片Windeployqt命令在Windows下打包Qt程序QDesktopServices&Qurl写一个浏览器搜索框QVBoxLayout在滚动区域同时显示多个图片QProgressDialog&QTimer设置进度条QColor&QBrush&QRect&QPixmap&QPainter设置颜色QtabWidget设置多个窗口与信号QStackedWidget的简单使用Qt多线程与网络通信创建线程生成随机数&冒泡&快排&显示出来使用第二种方式创建线程线程池QThreadPool基础的Qt套接字通信服务器端客户端多线程搭建发送文件的客户端与服务端客户端服务器端Qt事件事件处理函数的使用基于事件处理器函数自定义按钮自定义按钮添加信号事件的使用---案例event事件分发器事件过滤器QPainter绘图高级设置利用画家 画资源图片,调用绘图事件绘图设备QFile文件操作读:写:QFileIfo文件信息读取Qt的多媒体模块multimediavoid QSoundEffect::setLoopCount(int loopCount)void QSoundEffect:: setMuted ( bool muted )QUrl QSoundEffect:: source () constqreal QSoundEffect:: volume () const案例QAction其他数值输入和显示组件:使用QSlider控件使用QDial联动QLCDNumber,如图:QSlider控件操作QProgressBarQRadioButton控制QLCDNumber时间日期与定时器最后强调,计时器因为QTime的start方法被删除QComBox和QPainTextEdotQComBoxQPainTextEdotQMdiArea类QTabeView三角函数Qt HttpQGraphicsView绘图架构Qt连接mysql查询Qt中数据库的事务操作重写QChartView控件给控件绘画渐变图像Sqlite使用指令QComboBox设置Qt的SQL模块QsqlTableModel的使用QSQLQueryModel的使用QSqlRelationalTableModel的使用自定义Qt Designer插件Qt编译静态库且使用创建和使用共享库接下来我们看如何显式调用动态库,编译时无序动态库的任何文件用模块定义文件(.def)解决函数名的问题ABIAPI和ABIQt互斥量,线程同步网络编程[static]QList < QHostAddress > QNetworkInterface:: allAddresses ()[static]QList < QNetworkInterface >QNetworkInterface:: allInterfaces ()
Qt基础控件
ToolButton按钮设置图标的方法
和普通的Push Button按钮不同 它设置图标需要记得勾选一个控件
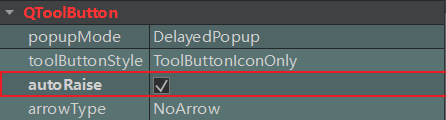

否则就算设置好控件的长宽与图片的一样依旧不行,会有一个框框。
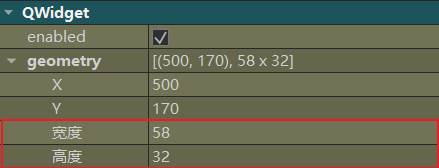
而且一定要看图片的长宽,我们这个图片的大小是58*32,就算在iconSize内设置多大也不会再有变化,同时按钮控件的范围最好也保持一致,不然会出现实际点击界面大于图片显示界面。直接使用代码设置图片也大差不差,就是指定控件,然后加一个set,比如下面这样
xxxxxxxxxxui->toolButton>setIcon(QIcon(":/1/3.Button_Small-Em_Gray.png"));高度宽度就不说了,api都差不多。
scrollArea滚动区域使用QLabel标签添加图片
我们这里说说图片,控件,文字什么的都差不多,先看代码
xxxxxxxxxxQLabel*pic=new QLabel; pic->setPixmap(QPixmap(":/1/2.jpg"));//标签类添加图像 ui->scrollArea->setWidget(pic);//放入到滚动区域 pic->setFixedWidth(1200); //必须设置固定大小居中才能生效 pic->setFixedHeight(1200); ui->scrollArea->setAlignment(Qt::AlignHCenter);//设置居中
我们为什么要设置固定大小?当然,我们设置的固定大小是图片大小。
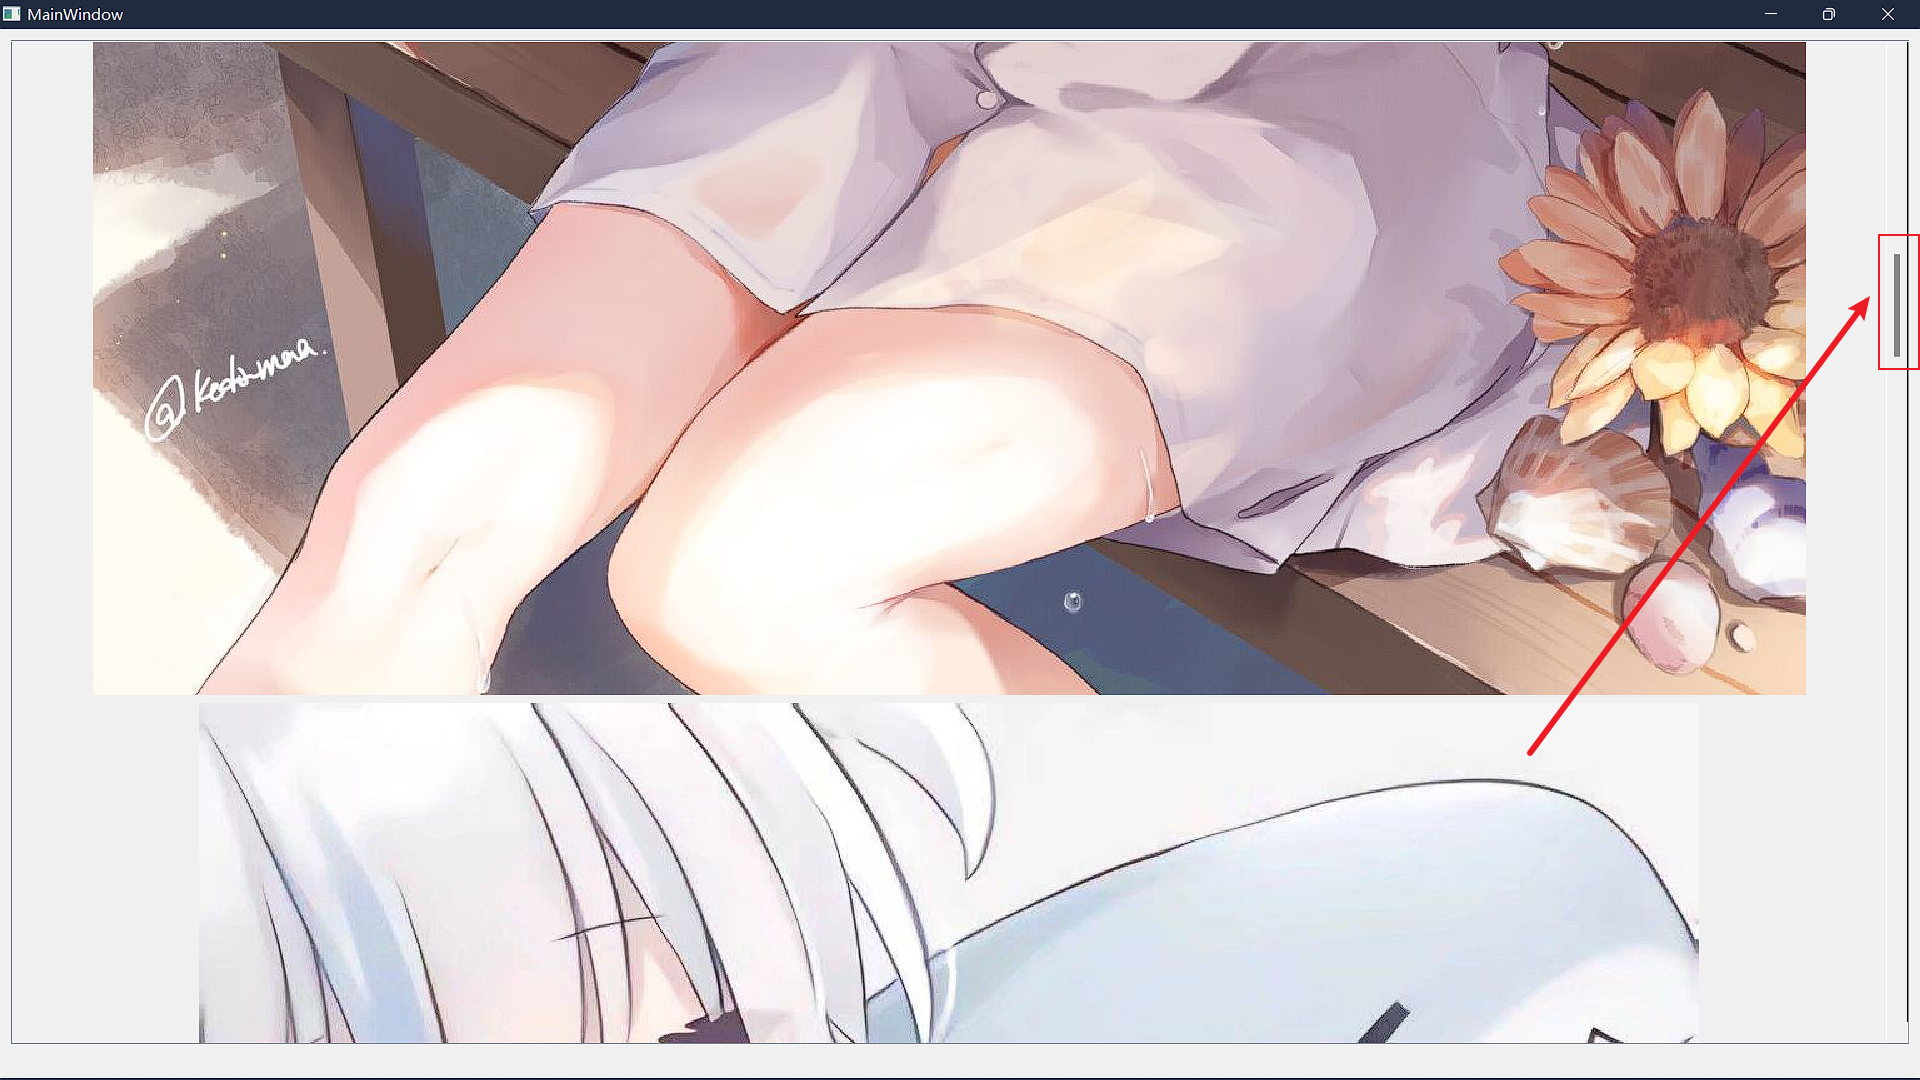
首先为了缩放和主窗口一起 我们还得设置一个东西:在设计师模式设置整个主窗口为水平布局,scrollArea控件就会随着主窗口的变化自动收缩了。比如下面这样

scrollArea控件的大小基本等于主窗口了,我们可以用下拉或者又拉查看整个画面。
固定大小的原因在于:如若不固定,那么会自动把图片填充满整个scrollArea控件,它会认为这全部都是它的大小,水平居中也就没有意义了,因为它觉得,我都已经满了,还居中啥,也就是说,一个很小的图片,如果加入scrollArea而不设置固定大小,实际上scrollArea把图片作为一部分实际上填满了自己。
Windeployqt命令在Windows下打包Qt程序
首先要找到Qt的命令提示符

用哪种编译器就用哪个打包
- 先让项目用release跑一遍
- 使用命令提示符,cd到对应生成的exe路径(推荐重新创建一个文件夹再拷贝exe就行)
- 输入windeployqt 程序名称 程序名称也就是exe后缀的
然后就会自动把对应的库,也就是dll等文件拷贝过来,就完成了
QDesktopServices&Qurl写一个浏览器搜索框
代码如下
xxxxxxxxxx    //添加到toolBar工具栏    QPushButton*b=new QPushButton("搜索");    ui->toolBar->addWidget(b);//添加一个按钮搜索    QPushButton*e=new QPushButton("清除");    ui->toolBar->addWidget(e);//添加一个按钮清除    QLineEdit*edit = new QLineEdit;    ///edit->setMaximumWidth(200);//设置最大宽度为200    edit->setFixedWidth(300);//设置固定宽度为300    edit->setFixedHeight(25);//设置固定高度为30    ui->toolBar->addWidget(edit);//添加一个单行搜索框    edit->setFont(QFont( "宋体" , 10 ,  QFont::Normal) );//设置字体和大小    edit->setPlaceholderText("你要搜索什么呢?(*^▽^*)");//设置默认显示    edit->setMaxLength(30);//设置最大的输入字符数    //edit->setText("666"); //类似于设置默认显示的test
   connect(b,&QPushButton::clicked,this,[=]()//进行搜索   {       QString value=edit->text();            //获取QLineEdit搜索框输入的值       //QDesktopServices::openUrl(QUrl("https://www.baidu.com/s?ie=UTF-8&wd="+value));//百度        QDesktopServices::openUrl(QUrl("https://www.bing.com/search?q="+value));//必应   });   connect(e,&QPushButton::clicked,this,[=]()   {       edit->clear();//清空文本框的内容   });
视图如下:

这里面唯一特殊的也就是我们设置的搜索按钮触发的信号QDesktopServices::openUrl方法用于访问一个网址,参数要求是QUrl类型的
QVBoxLayout在滚动区域同时显示多个图片
xxxxxxxxxxQVBoxLayout*vlayout=new QVBoxLayout; for(int i=0;i<8;i++) { QLabel*pic=new QLabel; //拼接字符串路径 QString name=QString(":/1/%1").arg(i+1); //设置QLabel的图片 pic->setPixmap(QPixmap(name)); //设置居中 pic->setAlignment(Qt::AlignHCenter); //将已经设置好图片的标签QLabel插入到vlayout内 vlayout->addWidget(pic); } //下面三行只是为了覆盖掉之前的设计 不需在意 我们的wg会覆盖掉之前的设计 QWidget*wg=new QWidget; wg->setLayout(vlayout); ui->scrollArea->setWidget(wg);成品差不多下面这样
我们可以看到有不止一张图片,下拉选项也很长,那就没问题了。
QProgressDialog&QTimer设置进度条
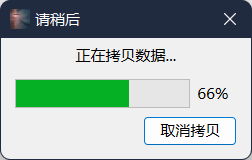
xxxxxxxxxxQProgressDialog * progress=new QProgressDialog("正在拷贝数据...","取消拷贝",0,100,this); //初始化并显示进度条窗口 对话框的标题 progress->setWindowTitle("请稍后"); progress->show(); //更新进度条 static int value=0; //这里使用static是为了重复调用的时候value不被释放内存 QTimer *timer=new QTimer;//构造QTimer对象 connect(timer,&QTimer::timeout,this,[=]()//这个信号槽没什么好说的 它是用timer发射的信号 { progress->setValue(value); value++; //当value > 最大值的时候 if(value > progress->maximum()) { timer->stop();//直到调用stop方法才会停止 value=0; delete progress; delete timer; } }); //用于点击取消后得以退出的信号槽 connect(progress,&QProgressDialog::canceled,this,[=]()//此信号槽在点击取消按钮的时候触发 { timer->stop();//退出 value=0; }); timer->start(50);//以msec毫秒的超时间隔启动或重新启动计时器。 这里也就是隔50毫秒运行如下:
我们第三行调用的是show方法,其实也可以使用模态,例如下面这样
xxxxxxxxxxprogress->setWindowModality(Qt::WindowModal); //使用模态Qt::NonModal 非模态 Qt::WindowModal 模态+阻塞父窗口 Qt::ApplicationModal 模态 阻塞应用程序中的所有窗口
QColor&QBrush&QRect&QPixmap&QPainter设置颜色
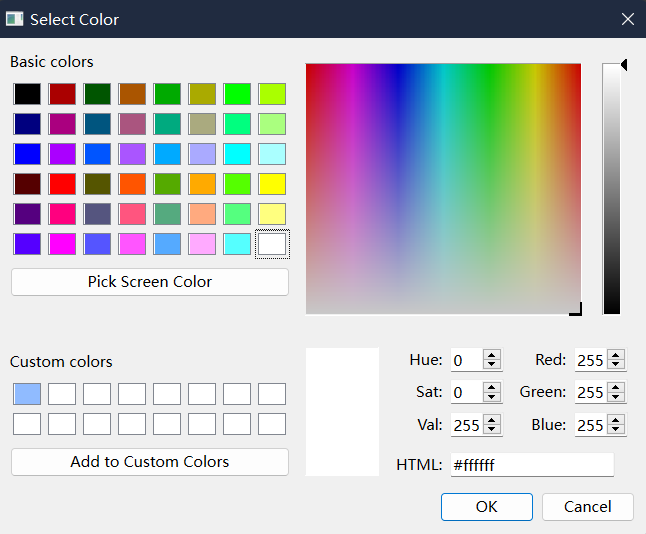
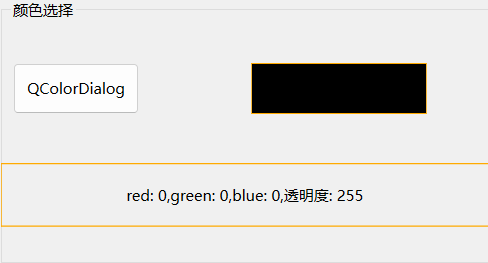
xxxxxxxxxx QColor color = QColorDialog::getColor(); //使用我们选择好的颜色属性创建brush对象 QBrush brush(color); //使用Label控件color的宽和高创建rect对象 QRect rect(0,0,ui->color->width(),ui->color->height()); //设置显示大小,使用rect的宽和高 QPixmap pix(rect.width(),rect.height()); QPainter p(&pix); //填满矩形 参数为大小与颜色 p.fillRect(rect,brush); //设置Label的颜色 所有的ui->color都是Label控件 我们先前添加的 ui->color->setPixmap(pix); //字符串拼接 然后修改Label内容显示出来 QString text =QString("red: %1,green: %2,blue: %3,透明度: %4") .arg(color.red()).arg(color.green()).arg(color.blue()).arg(color.alpha()); ui->colorlabel->setText(text);行代码是一个封装的调用,会显示如下这样:
我们手动选择之后就返回一个QColor对象
然后就会显示:
QtabWidget设置多个窗口与信号
代码如下:
xxxxxxxxxx//移除tab页 也就是点击那个x就会触发 移除之前进行保存信息 connect(ui->tabWidget,&QTabWidget::tabCloseRequested,this,[=](int index) { QWidget*wg=ui->tabWidget->widget(index);//部件 QString title=ui->tabWidget->tabText(index);//标题 m_widgets.enqueue(wg); m_names.enqueue(title); //移除 ui->tabWidget->removeTab(index); //按钮状态设置为可用 ui->addBtn->setEnabled(true); }); //单纯的点击就会触发,比如重复点击同一个 connect(ui->tabWidget,&QTabWidget::tabBarClicked,this,[=](int index) { qDebug()<<"我被点击了 我的的标题是:"+QString(ui->tabWidget->tabText(index)); }); //必须切换,也就是重复点击相同控件无法触发 connect(ui->tabWidget,&QTabWidget::currentChanged,this,[=](int index) { qDebug()<<"我被切换了 的标题是:"+QString(ui->tabWidget->tabText(index)); }); //按钮 用于恢复之前删除的 connect(ui->addBtn,&QPushButton::clicked,this,[=](){ ui->tabWidget->addTab(m_widgets.dequeue(),m_names.dequeue()); if(m_widgets.empty()) { //设置按钮不可用 ui->addBtn->setDisabled(true); } });
这里面的m_widgets与m_names放在类的私有成员也就是头文件处;
xxxxxxxxxxQQueue<QWidget*>m_widgets;QQueue<QString>m_names;我们写了四个信号的,第一个connect的主要在于注意在删除之前先备份数据放入队列与字符串内,然后即可调用removeTab方法传入index进行删除。
第二三connect没什么好说的,正常触发。
第四个connect是一个按钮触发的信号,目的是恢复被我们删除的窗口 如下
ui->tabWidget->addTab(m_widgets.dequeue(),m_names.dequeue());
同时要判断队列是否为空,如果为空证明我们已经恢复完了,没有东西再进行创建,此时设置为不可用状态ui->addBtn->setDisabled(true);,同时第一个connect如果有删除控件,那么就代表队列被插入了数据,也就可以使用恢复,按钮自然也就要恢复ui->addBtn->setEnabled(true);
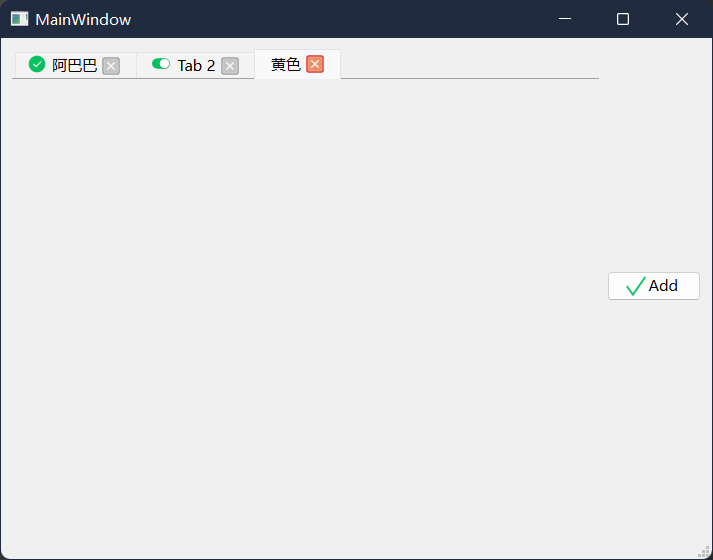
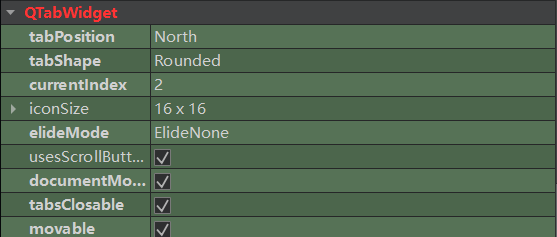
简单设置与界面如下:
QStackedWidget的简单使用
其实这个类和上面那个差不多,先看设计师模式下设置
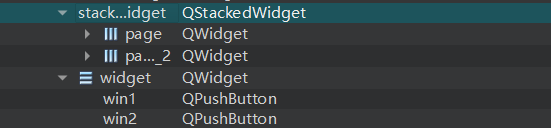
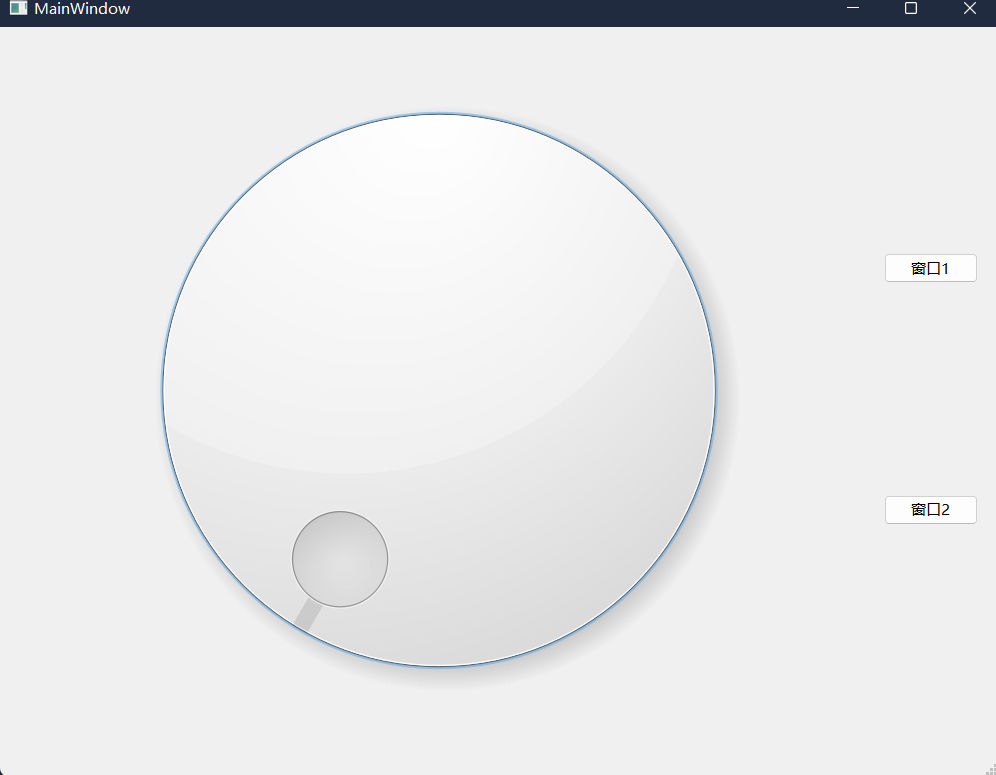
也就是一个StackedWidget控件有两个页面,然后再主页面上还有两个按钮用于控制它们的切换:
代码如下:
xxxxxxxxxx//设置默认显示的窗口    ui->stackedWidget->setCurrentWidget(ui->page_2);
    connect(ui->win1,&QPushButton::clicked,this,[=]()    {        ui->stackedWidget->setCurrentIndex(0);    });    connect(ui->win2,&QPushButton::clicked,this,[=]()    {        ui->stackedWidget->setCurrentIndex(1);    });
Qt多线程与网络通信
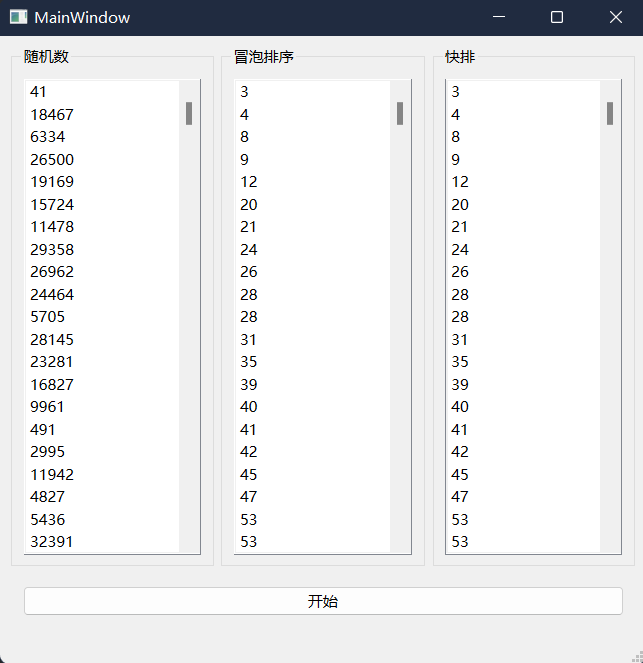
创建线程生成随机数&冒泡&快排&显示出来
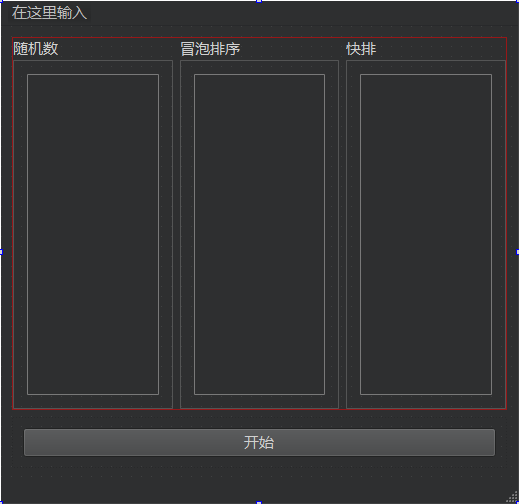
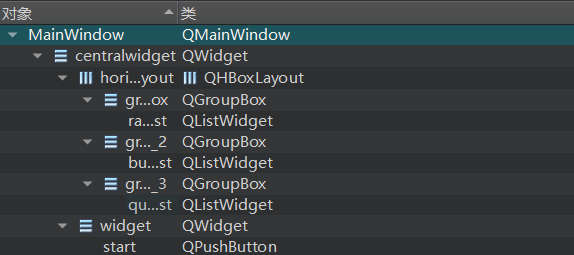
我们先从第一步开始 设计师模式的控件:
我们创建了一个Generate类,如下 创建线程必须继承QThread类 同时重写run方法,它就是我们线程执行的代码
Generate.h
xxxxxxxxxx
class Generate : public QThread{ Q_OBJECTpublic: explicit Generate(QObject *parent = nullptr);
void recvNum(int num);protected: void run()override;signals: void sendArray(QVector<int> num);private: int m_num;};
// GENERATE_H
Generate.cpp
xxxxxxxxxxGenerate::Generate(QObject *parent): QThread{parent}{}
void Generate::recvNum(int num){ m_num=num;}void Generate::run(){ qDebug()<<"生成随机数的线程的线程地址:"<<QThread::currentThread(); QVector<int>list; QElapsedTimer time; for(int i=0;i<m_num;++i) { list.push_back(rand()%100000); } int milsec=time.elapsed(); qDebug()<<"生成"<<m_num<<"个随机数总共用时:"<<milsec<<"毫秒"; emit sendArray(list);//触发信号}
就不放全部代码了,太麻烦 在mainWindow.h文件我们还创建了void starting(int num);信号 cpp有用代码如下
xxxxxxxxxx    //1.创建子线程对象    Generate*gen=new Generate;
    //这是一个自定义信号的connect 由this发出starting信号,gen对象的recvNum方法进行处理    connect(this,&MainWindow::starting,gen,&Generate::recvNum);
    //2.启动子线程    connect(ui->start,&QPushButton::clicked,this,[=]()    {        emit starting(10000);        gen->start();    });    //接收子线程发送的数据    connect(gen,&Generate::sendArray,this,[=](QVector<int>list)    {        for(int i=0;i<list.size();++i)        {            ui->randList->addItem(QString::number(list.at(i)));        }    });
第二行代码就使用了该信号调用recvNum来处理
进行冒泡与快排同时显示
接下来我们看看写好的冒泡类和快排类以及更改的mainWindow文件
xxxxxxxxxxclass BubbleSort:public QThread{    Q_OBJECTpublic:    explicit BubbleSort(QObject *parent=nullptr);    void recvArray(QVector<int>list);protected:    void run()override;signals:    void finish(QVector<int> num);private:    QVector<int>m_list;};
class QuickSort:public QThread{    Q_OBJECT;public:    explicit QuickSort(QObject*parent=nullptr);    void recvArray(QVector<int>list);protected:    void run()override;signals:    void finish(QVector<int>list);private:    QVector<int>m_list;    void quickSort(int left, int right, QVector<int>& arr);};
下面是两个类的实现:
xxxxxxxxxxBubbleSort::BubbleSort(QObject *parent):QThread(parent){}
void BubbleSort::recvArray(QVector<int> list){    m_list=list;}void BubbleSort::run(){    qDebug()<<"冒泡排序的线程的线程地址:"<<QThread::currentThread();    QElapsedTimer time;    time.start();    for(int i=0;i<m_list.size();++i)    {        for(int j=0;j<m_list.size()-i-1;++j)        {            if(m_list[j]>m_list[j+1])            {            std::swap(m_list[j],m_list[j+1]);            }        }    }    int milsec=time.elapsed();    qDebug()<<"冒泡排序用时:"<<milsec<<"毫秒";    emit finish(m_list);}
//QucikSort类方法的实现如下
QuickSort::QuickSort(QObject *parent):QThread(parent){}
void QuickSort::recvArray(QVector<int> list){    m_list=list;}void QuickSort::run(){    qDebug()<<"快速排序的线程的线程地址:"<<QThread::currentThread();    QElapsedTimer time;    time.start();    quickSort(0,m_list.size()-1,m_list);    int milsec=time.elapsed();    qDebug()<<"快速排序用时:"<<milsec<<"毫秒";    emit finish(m_list);}
void QuickSort::quickSort(int left, int right, QVector<int>& arr){    if (left >= right)        return;    int i=left, j=right, base = arr[left];//取最左边的数为基准数    while (i < j){        while (arr[j] >= base && i < j)            j--;        while (arr[i] <= base && i < j)            i++;        if (i < j) {            std::swap(arr[i], arr[j]);        }    }    std::swap(arr[left], arr[i]);    quickSort(left, i - 1, arr);//递归左边    quickSort(i + 1, right, arr);//递归右边}
mainWind修改后代码如下
xxxxxxxxxx    //1.创建子线程对象    Generate*gen=new Generate;    BubbleSort*bubble=new BubbleSort;    QuickSort*quick=new QuickSort;
    //这是一个自定义信号的connect 由this发出starting信号,gen对象的recvNum方法进行处理    connect(this,&MainWindow::starting,gen,&Generate::recvNum);
    //2.启动子线程    connect(ui->start,&QPushButton::clicked,this,[=]()    {        emit starting(10000);        gen->start();    });
    //下面两个connect用于调用sendArray方法的时候对冒泡类或者快排类的QVector赋值    connect(gen,&Generate::sendArray,bubble,&BubbleSort::recvArray);    connect(gen,&Generate::sendArray,quick,&QuickSort::recvArray);
//接收子线程发送的数据 connect(gen,&Generate::sendArray,this,[=](QVector<int>list) { bubble->start(); quick->start(); for(int i=0;i<list.size();++i) { ui->randList->addItem(QString::number(list.at(i))); } }); connect(bubble,&BubbleSort::finish,this,[=](QVector<int>list) { for(int i=0;i<list.size();++i) { ui->bubbleList->addItem(QString::number(list.at(i))); } }); connect(quick,&QuickSort::finish,this,[=](QVector<int>list) { for(int i=0;i<list.size();++i) { ui->quickList->addItem(QString::number(list.at(i))); } });- 是创建三个对象,也就是随机数,冒泡,快排;第一个connect是用来当调用starting(n)的时候会调用recvNum方法,也就是准备创建n个随机数
- 这个connect是随机数对象创建的,点击按钮后就调用starting(10000);会触发第一个的信号 然后开启线程,创建随机数
- 第三和第四个connect只是用于把冒号和快排对象的QVector对象赋值随机数,第五个connect也一起讲一下,为什么?看下面的代码
xxxxxxxxxxvoid Generate::run(){ qDebug()<<"生成随机数的线程的线程地址:"<<QThread::currentThread(); QVector<int>list; QElapsedTimer time; for(int i=0;i<m_num;++i) { list.push_back(rand()%100000); } int milsec=time.elapsed(); qDebug()<<"生成"<<m_num<<"个随机数总共用时:"<<milsec<<"毫秒"; emit sendArray(list);}不要遗忘了第一个随机数对象运行的时候最后一行代码是调用的sendArray(list);信号,也就是同时触发了3,4,5这三个connect
也就是完成了给BubbleSort与QuickSort的QVector
最后两个connect使用的是各自自己类的finish信号,我们就举一个快排类的例子,冒泡也大差不差
xxxxxxxxxxvoid QuickSort::run(){ qDebug()<<"快速排序的线程的线程地址:"<<QThread::currentThread(); QElapsedTimer time; time.start(); quickSort(0,m_list.size()-1,m_list); int milsec=time.elapsed(); qDebug()<<"快速排序用时:"<<milsec<<"毫秒"; emit finish(m_list);}这个也是在run方法,也就是线程开启的时候执行的代码,进行排序,计时,然后将排序好的QVector传入信号finish;
也就会触发在mainWindow的connect,执行函数将排序好的数字显示到对应的文本框。冒泡同理,不再强调
运行结果如下:

这种方式只适合单个任务,如果处理多个任务推荐使用下面这种
使用第二种方式创建线程
首先要创建一个任务类,必须要添加一个任务函数,叫什么无所谓,可以自由的传递参数。想要往外传递数据还是使用信号
任务函数的功能就是线程开启执行的代码,类似于第一种线程方式的run(),不过它是重写父类的方法,所以不能传参数
我们的任务对象必须继承QObject对象,因为在QObject内有一个方法叫moveToThread用于将任务对象移动到对应的子线程
修改的代码如下,三个类:
xxxxxxxxxxclass Generate : public QObject{    Q_OBJECTpublic:    explicit Generate(QObject *parent = nullptr);    void working(int num);signals:    void sendArray(QVector<int> num);};
class BubbleSort:public QObject{    Q_OBJECTpublic:    explicit BubbleSort(QObject *parent=nullptr);    void working(QVector<int>list);signals:    void finish(QVector<int> num);};
class QuickSort:public QObject{ Q_OBJECT;public: explicit QuickSort(QObject*parent=nullptr); void working(QVector<int>list);private: void quickSort(int left, int right, QVector<int>& arr);signals: void finish(QVector<int>list);};这里主要的改变在于继承从QThread变成QObject,且把run方法换成了working任务函数,它能够传参,同时也就去除了三个类的私有成员,以及recvArray方法。信号不变,看cpp实现代码如下:
xxxxxxxxxxGenerate::Generate(QObject *parent): QObject{parent}{}
void Generate::working(int num){    qDebug()<<"生成随机数的线程的线程地址:"<<QThread::currentThread();    QVector<int>list;    QElapsedTimer time;    time.start();    for(int i=0;i<num;++i)    {        list.push_back(rand()%100000);    }    int milsec=time.elapsed();    qDebug()<<"生成"<<num<<"个随机数总共用时:"<<milsec<<"毫秒";    emit sendArray(list);}
BubbleSort::BubbleSort(QObject *parent):QObject(parent){}
void BubbleSort::working(QVector<int>list){    qDebug()<<"冒泡排序的线程的线程地址:"<<QThread::currentThread();    QElapsedTimer time;    time.start();    for(int i=0;i<list.size();++i)    {        for(int j=0;j<list.size()-i-1;++j)        {            if(list[j]>list[j+1])            {            std::swap(list[j],list[j+1]);            }        }    }    int milsec=time.elapsed();    qDebug()<<"冒泡排序用时:"<<milsec<<"毫秒";    emit finish(list);}QuickSort::QuickSort(QObject *parent):QObject(parent){
}void QuickSort::working(QVector<int>list){    qDebug()<<"快速排序的线程的线程地址:"<<QThread::currentThread();    QElapsedTimer time;    time.start();    quickSort(0,list.size()-1,list);    int milsec=time.elapsed();    qDebug()<<"快速排序用时:"<<milsec<<"毫秒";    emit finish(list);}void QuickSort::quickSort(int left, int right, QVector<int>& arr){    if (left >= right)        return;    int i=left, j=right, base = arr[left];//取最左边的数为基准数    while (i < j){        while (arr[j] >= base && i < j)            j--;        while (arr[i] <= base && i < j)            i++;        if (i < j) {            std::swap(arr[i], arr[j]);        }    }    std::swap(arr[left], arr[i]);    quickSort(left, i - 1, arr);//递归左边    quickSort(i + 1, right, arr);//递归右边}
除了去除了几个recvArray的实现,把私有的m_list变成传参的list以外也就没啥区别了,下面是mainWindows.cpp的主要代码
//1.创建子线程对象    QThread*t1=new QThread;    QThread*t2=new QThread;    QThread*t3=new QThread;
    ///2.創建人物类的对象    Generate*gen=new Generate;    BubbleSort*bubble=new BubbleSort;    QuickSort*quick=new QuickSort;
    //3.将任务对象移动到某个子线程中    gen->moveToThread(t1);    bubble->moveToThread(t2);    quick->moveToThread(t3);
    //这是一个自定义信号的connect 由this发出starting信号,gen对象的recvNum方法进行处理    connect(this,&MainWindow::starting,gen,&Generate::working);
    //2.启动子线程    connect(ui->start,&QPushButton::clicked,this,[=]()    {        emit starting(10000);        t1->start();    });
    //下面两个connect用于调用第一个connect被触发的时候触发信号working就会传入参数到这里进行排序    connect(gen,&Generate::sendArray,bubble,&BubbleSort::working);    connect(gen,&Generate::sendArray,quick,&QuickSort::working);
    //接收子线程发送的数据    connect(gen,&Generate::sendArray,this,[=](QVector<int>list)    {        t2->start();        t3->start();        for(int i=0;i<list.size();++i)        {            ui->randList->addItem(QString::number(list.at(i)));        }    });    connect(bubble,&BubbleSort::finish,this,[=](QVector<int>list)    {        for(int i=0;i<list.size();++i)        {            ui->bubbleList->addItem(QString::number(list.at(i)));        }    });    connect(quick,&QuickSort::finish,this,[=](QVector<int>list)    {        for(int i=0;i<list.size();++i)        {            ui->quickList->addItem(QString::number(list.at(i)));        }    });
    //当前窗口释放的时候会释放destory信号,就会执行我们下面的代码    connect(this,&MainWindow::destroy,this,[=]()    {       t1->quit();//退出线程的事件循环       t1->wait();//等待       t1->deleteLater();//销毁线程对象
       t2->quit();       t2->wait();       t2->deleteLater();
       t3->quit();       t3->wait();       t3->deleteLater();
       gen->deleteLater();       bubble->deleteLater();       quick->deleteLater();    });
步入正题了,我们首先直接创建三个线程对象,然后再创建三个类对象。它们互相对应。
我们使用线程对象的moveToThread方法将任务对象放入到线程对象中
第一二三四个connect都和第一种方法没什么区别。不过:第二个connect的开启线程是t1->start也就是说我们都是直接操控线程对象。
第一种创建线程方法在第三四个connect调用的方法是进行赋值的,run是自己线程开启的时候执行排序之类的。而我们这种方法,因为可以传参,首先省掉了私有成员的开销,也省掉了赋值成员函数的开销。当然这还不是重点,看下面
捋一捋,首先点击按钮触发staring信号,开启t1线程;staring触发后执行gen的working方法,也就是随机数,执行完working方法发时候触发sendArray信号;这个信号会触发三个信号槽,触发冒泡与快排的working方法,第三个就是开启线程,线程对象就会分别让子线程去执行冒泡与快排的working方法,同时主线程这里将随机数显示出来;然后bubble和quick的connect他们working方法会触发finish信号;也就会有2个connect执行,分别对应显示冒泡和显示快排的结果。
最后一步就是线程资源的释放:
线程对象的quick是如果线程在事件循环就退出,否则则不执行操作,wait则是等待线程结束,类似于join,deleteLater方法和之前delete没啥区别。
线程池QThreadPool
使用qt的线程池则不需要自己释放资源,线程池来维护

同时它比较智能,我们可以看出来,当随机数创建完毕后,线程空闲不会浪费,用来进行冒泡排序
快速排序则用到线程池的另一个线程精选排序
不再说那么详细了,拿一个类举例
xxxxxxxxxxclass Generate : public QObject,public QRunnable{    Q_OBJECTpublic:    explicit Generate(QObject *parent = nullptr);
    void recvNum(int num);
    void run()override;
signals:    void sendArray(QVector<int> num);
private:    int m_num;};
我们不再继承QThread,改成QObject和QRunnable也就是线程池类;这是拿第一种创建线程方式改进的,其实没什么变化,cpp实现没什么变化。直接看mainWindow的cpp
xxxxxxxxxx //1.创建任务类对象    Generate*gen=new Generate;    BubbleSort*bubble=new BubbleSort;    QuickSort*quick=new QuickSort;
    connect(this,&MainWindow::starting,gen,&Generate::recvNum);
    //2.启动子线程    connect(ui->start,&QPushButton::clicked,this,[=]()    {        emit starting(10000);        QThreadPool::globalInstance()->start(gen);    });
    //下面两个connect用于调用sendArray方法的时候对冒泡类或者快排类的QVector赋值    connect(gen,&Generate::sendArray,bubble,&BubbleSort::recvArray);    connect(gen,&Generate::sendArray,quick,&QuickSort::recvArray);
//接收子线程发送的数据 connect(gen,&Generate::sendArray,this,[=](QVector<int>list) { QThreadPool::globalInstance()->start(bubble); QThreadPool::globalInstance()->start(quick); for(int i=0;i<list.size();++i) { ui->randList->addItem(QString::number(list.at(i))); } }); connect(bubble,&BubbleSort::finish,this,[=](QVector<int>list) { for(int i=0;i<list.size();++i) { ui->bubbleList->addItem(QString::number(list.at(i))); } }); connect(quick,&QuickSort::finish,this,[=](QVector<int>list) { for(int i=0;i<list.size();++i) { ui->quickList->addItem(QString::number(list.at(i))); } });和第一种创建线程方式没什么区别,只是把开启线程变成了QThreadPool::globalInstance()->start(bubble);这种样子,它是调用了线程池的静态方法。因为有线程池的存在,我们不需要自己释放资源。
基础的Qt套接字通信
C++的标准库不提供套接字通信的api,只能使用平台提供的C语言的api,但是Qt框架提供了。我们写了两个项目的代码,分别是服务器端和客户端,让它们进行连接,以此简单的演示。
Qt想要使用网络编程这方面的必须子阿pro文件加上QT += network相当于引入模块
以及三个头文件
xxxxxxxxxx
服务器端
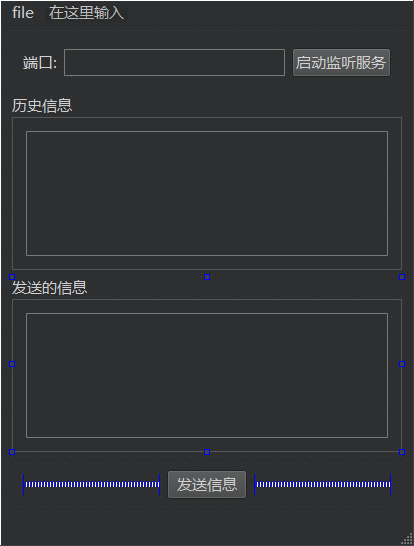
下面是设计师界面和属性

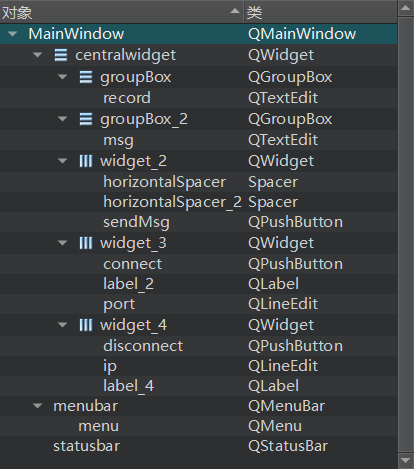
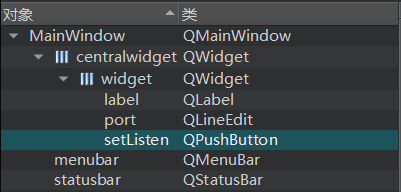
我们直接先看mainWindows.h的主要代码
xxxxxxxxxxclass MainWindow : public QMainWindow{ Q_OBJECTpublic: MainWindow(QWidget *parent = nullptr); ~MainWindow();private slots: void on_setListen_clicked(); void on_sendMsg_clicked();private: Ui::MainWindow *ui; QTcpServer*m_s; QTcpSocket*m_tcp; QLabel*m_status;};头文件没什么好说的,类的两个信号对应的是两个按钮;
QTcpServer*m_s;它的作用主要是用来监听地址和端口。当有新的 TCP 连接,会触发 newConnection() 信号,此时可以调用 nextPendingConnection() 以将挂起的连接接受为已连接的 QTcpSocket,通过该对象可以与客户端通信。
也就是可以m_tcp=m_s->nextPendingConnection();
QTcpSocket*m_tcp;主要作用在数据之间的传输操作,写入读取等。
QLabel*m_status;这个只是用来更改连接状态的图片的。主要的实现代码如下:
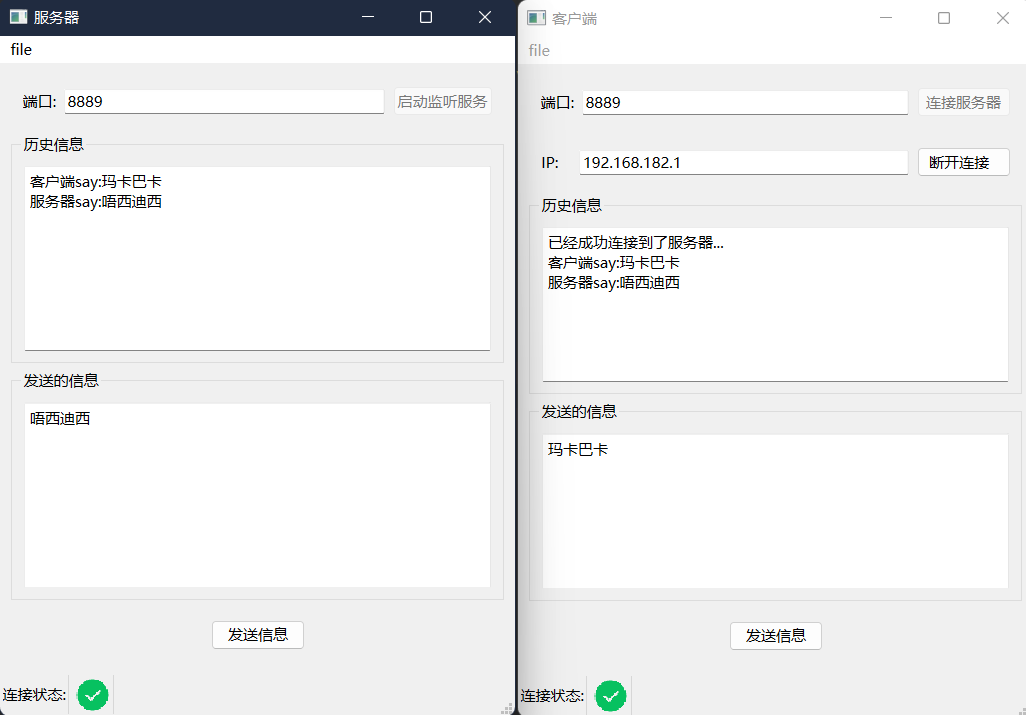
xxxxxxxxxx ui->port->setText("8889"); setWindowTitle("服务器"); //创建监听的服务器对象 m_s=new QTcpServer(this); //在连接成功的时候被触发 connect(m_s,&QTcpServer::newConnection,this,[=]() { m_tcp=m_s->nextPendingConnection();//实例化对象 //在连接成功的时候设置图片 m_status->setPixmap(QPixmap(":/done.png").scaled(30,30)); //检测是否可以接收数据 connect(m_tcp,&QTcpSocket::readyRead,this,[=]() { QByteArray data = m_tcp->readAll(); ui->record->append("客户端say:"+data); }); //被断开连接的时候触发此信号 connect(m_tcp,&QTcpSocket::disconnected,this,[=]() { m_tcp->close(); m_tcp->deleteLater(); m_status->setPixmap(QPixmap(":/Icons_Tint Color_Black.svg").scaled(30,30)); }); }); //状态栏 m_status=new QLabel; m_status->setPixmap(QPixmap(":/Icons_Tint Color_Black.svg").scaled(30,30)); ui->statusbar->addWidget(new QLabel("连接状态:")); ui->statusbar->addWidget(m_status);}void MainWindow::on_setListen_clicked(){ unsigned short port=ui->port->text().toUShort(); m_s->listen(QHostAddress::Any,port);//监听指定地址和断开 ui->setListen->setDisabled(true);//设置按钮为不可用状态}void MainWindow::on_sendMsg_clicked(){ //以纯文本的方式把数据显示出来 QString msg=ui->msg->toPlainText(); m_tcp->write(msg.toUtf8()); ui->record->append("服务器say:"+msg);}
先给端口的控件设置默认显示8889,然后设置程序的标题为服务器;创建监听的服务器对象,也就是给成员指针new赋值,我们指定了this作为父对象,那么则不需要delete了,在释放资源的时候,Qt框架会自动为我们释放。
第一个信号槽,需要newConnection触发,其实我们已经介绍过了:当有新的 TCP 连接,会触发 newConnection() 信号
我们先看按钮,第一个按钮是监视,点击它就会读取我们的port控件里面的数据,转换为short保存,然后m_s调用 listen() 监听指定的地址和端口。然后把按钮设置为不可用状态,因为点击了就不能再点击了。
我们看状态栏,它其实就是设置左下角的状态的先new一个Label,然后m_status再加一个图片。它就完成了。然后给我们的控件加上文字描述,然后再加一个m_status也就是加一个图片,也就是设置默认状态,默认的图片。
知道这些之后我们就可以假设监视的按钮被点击后,如果有新的tcp连接,就会触发第一个信号槽:我们给m_tcp实例化。同时设置 m_status的图片为另一个,也就是一个勾勾,默认是叉叉。因为我们的statusbar控件已经被添加为m_status,所以修改它就相当于修改了m_status显示的图片。
里面还嵌套了connect,第一个的信号是QTcpSocket::readyRead,当有新的数据到来,会触发 readyRead() 信号,此时在槽函数中进行读取即可。QByteArray data = m_tcp->readAll();。readAll函数会读取全部的缓冲区数据,data进行接收,然后ui->record->append("客户端say:"+data);也就是把得到的数据全部放到record控件内,即历史记录。
嵌套的第二个connect就很简单了,如果被断开就触发信号:close 关闭套接字的 IO,以及套接字的连接;然后调用的deleteLater();和直接delete没什么区别。最后把图片设置为叉叉就行。
客户端
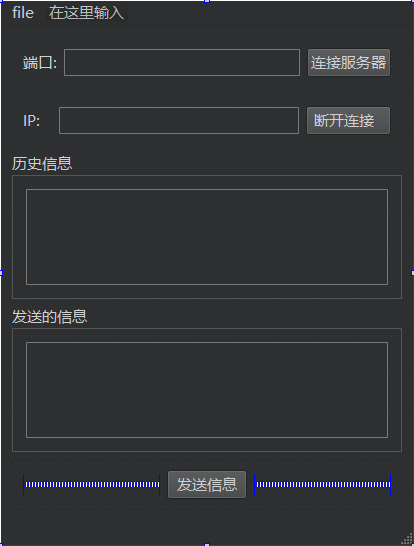
接下来我们写客户端:设计师模式如下
强调一下,为什么服务器端只有端口没有ip?因为服务器是在我们主机上,服务器所在的主机有ip,客户端的ip是为了连接我们的服务器的ip。端口是一个网络设备的接口,独占一个,端口作为服务器响应接收的端口。
我们放的代码不放不重要的....
好,我们看h代码
xxxxxxxxxxclass MainWindow : public QMainWindow{ Q_OBJECTpublic: MainWindow(QWidget *parent = nullptr); ~MainWindow();private slots: void on_sendMsg_clicked(); void on_connect_clicked(); void on_disconnect_clicked();private: Ui::MainWindow *ui; QTcpSocket*m_tcp; QLabel*m_status;};三个信号对应三个按钮。QTcpSocketm_tcp;的作用和前面服务器端一样,QLabelm_status;还是改变状态的图片。cpp主要如下
xxxxxxxxxx{    ui->port->setText("8889");    ui->ip->setText("192.168.182.1");    setWindowTitle("客户端");    ui->disconnect->setDisabled(true);
    m_tcp=new QTcpSocket;    connect(m_tcp,&QTcpSocket::readyRead,this,[=]()    {        QByteArray data=m_tcp->readAll();        ui->record->append("服务器say:"+data);    });     connect(m_tcp,&QTcpSocket::disconnected,this,[=]()    {        m_tcp->close();        m_tcp->deleteLater();        m_status->setPixmap(QPixmap(":/Icons_Tint Color_Black.svg").scaled(30,30));        ui->record->append("服务器已经和客户端断开了...");        ui->connect->setDisabled(false);        ui->disconnect->setEnabled(false);    });    connect(m_tcp,&QTcpSocket::connected,this,[=]()    {        m_status->setPixmap(QPixmap(":/done.png").scaled(30,30));        ui->record->append("已经成功连接到了服务器...");        ui->connect->setDisabled(true);        ui->disconnect->setEnabled(true);    });    //状态栏    m_status=new QLabel;    m_status->setPixmap(QPixmap(":/Icons_Tint Color_Black.svg").scaled(30,30));    ui->statusbar->addWidget(new QLabel("连接状态:"));    ui->statusbar->addWidget(m_status);}void MainWindow::on_sendMsg_clicked(){    //以纯文本的方式把数据显示出来    QString msg=ui->msg->toPlainText();    m_tcp->write(msg.toUtf8());    ui->record->append("客户端say:"+msg);}void MainWindow::on_connect_clicked(){    QString ip=ui->ip->text();    unsigned short port=ui->port->text().toUShort();    m_tcp->connectToHost(QHostAddress(ip),port);}void MainWindow::on_disconnect_clicked(){    m_tcp->close();    ui->connect->setDisabled(false);    ui->disconnect->setEnabled(false);}
前面四行还是先分别设置默认的端口,ip,然后设置程序的标题,再设置按钮为不可用,这个按钮是用于断开连接,我们会在点击连接成功后设置为可用。
先看按钮,从connect按钮开始,也就是连接,先读取到ip,然后读取到port端口,然后使用connectToHost方法进行连接,传入ip和端口作为参数,这里进行了一个匿名构造QHostAddress(ip),它只能接收这种参数。连接到服务器端后就完成了。
不过这只是一个执行,不代表会连接成功,我们需要看第三个connect,如果触发了connected信号就代表连接成功,然后设置图片以及按钮状态。
如果点击第一个按钮那么就是把msg控件的数据发送出去,同时显示到record控件作为历史记录。
第一个connect信号槽是用来接收服务器端发送的数据,显示出来,然后剩下一个按钮和一个connect用作关闭的。状态栏和服务器一样。
上一个有一些没说清楚,readyRead信号是有新的数据到来会被触发
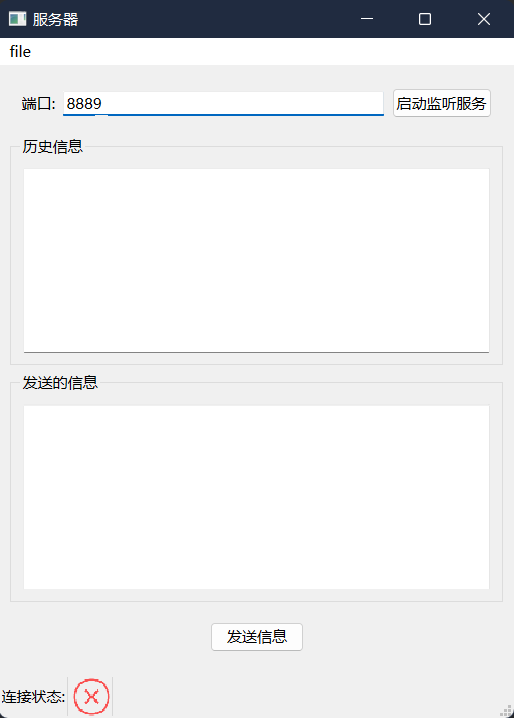
结果如下,懒得做美化:
多线程搭建发送文件的客户端与服务端
我们分为两个项目,先客户端,后服务器端
头文件需要如下:
xxxxxxxxxx注意pro文件QT += core gui network
客户端
先看设计师模式与属性

我们创建了一个sendfile的类,先看头文件重要的如下:
xxxxxxxxxxclass SendFile : public QObject{ Q_OBJECTpublic: explicit SendFile(QObject *parent = nullptr); //连接服务器 void connectServer(unsigned short port,QString ip); //发送文件 void sendFile(QString path);signals: void connectOK(); void gameover(); void curPercent(int num);private: QTcpSocket*m_tcp;};这个类是工作类,工作对象的函数会在线程里面执行。我们看到它有两个函数,分别表示连接和传输文件这两个功能。三个信号都是用于处理按钮信号要做的东西,在mainWindow的三个按钮不会完成全部的工作,会触发我们的信号,让工作类的方法在子线程里面运行。cpp实现两个方法如下:
xxxxxxxxxxvoid SendFile::connectServer(unsigned short port, QString ip){    qDebug()<<"连接服务器的线程:"<<QThread::currentThread();    m_tcp=new QTcpSocket;    m_tcp->connectToHost(QHostAddress(ip),port);    //在调用connectToHost () 并成功建立连接后发出此信号 然后触发connectOK自定义信号    connect(m_tcp,&QTcpSocket::connected,this,&SendFile::connectOK);    //关闭的时候触发此信号进行回收资源和关闭连接,同时触发另一个connect进行线程回收和断开连接    connect(m_tcp,&QTcpSocket::disconnected,this,[=]()    {        m_tcp->close();        m_tcp->deleteLater();        emit gameover();    });}void SendFile::sendFile(QString path){    qDebug()<<"发送文件的子线程:"<<QThread::currentThread();    QFile file(path);    QFileInfo info(path);    int fileSize=info.size();    file.open(QFile::ReadOnly);
    while(!file.atEnd())    {        static int num=0;        if(num==0)        {            //告诉服务器总共要发送多少数据            m_tcp->write((char*)&fileSize,4);        }        QByteArray line=file.readLine();        num+=line.size();        int percent=(num*100/fileSize);        emit curPercent(percent);//更新进度条的信号        //发送给服务器        m_tcp->write(line);    }}
看mainWindow的h主要文件
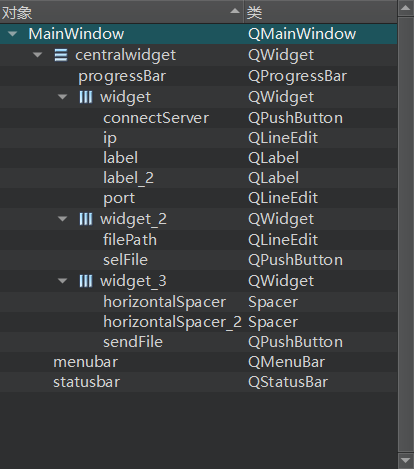
xxxxxxxxxxclass MainWindow : public QMainWindow{ Q_OBJECTpublic: MainWindow(QWidget *parent = nullptr); ~MainWindow();signals: void startConnect(unsigned short,QString); void sendFile(QString path);private slots: void on_connectServer_clicked(); void on_sendFile_clicked(); void on_selFile_clicked();private: Ui::MainWindow *ui;};这两个信号是用于在点击按钮的时候触发这两个信号,然后connect执行的就是工作类的方法。三个槽函数对应的三个按钮。先看cpp实现如下:
xxxxxxxxxx{ qDebug()<<"主线程:"<<QThread::currentThread(); ui->setupUi(this); ui->ip->setText("192.168.182.1"); ui->port->setText("8989"); ui->progressBar->setRange(0,100);//进度条范围 ui->progressBar->setValue(0);//进度条从0开始 //创建线程对象 QThread*t=new QThread; //创建任务对象 SendFile*worker=new SendFile; worker->moveToThread(t); connect(this,&MainWindow::sendFile,worker,&SendFile::sendFile); connect(this,&MainWindow::startConnect,worker,&SendFile::connectServer); //处理主线程发送的信号 connect(worker,&SendFile::connectOK,this,[=]() { QMessageBox::information(this,"连接服务器","已经成功连接了服务器,恭喜!"); }); connect(worker,&SendFile::gameover,this,[=]() { t->quit(); t->wait(); worker->deleteLater(); t->deleteLater(); }); connect(worker,&SendFile::curPercent,ui->progressBar,&QProgressBar::setValue); t->start();}//连接服务器按钮void MainWindow::on_connectServer_clicked(){ QString ip=ui->ip->text(); unsigned short port=ui->port->text().toUShort(); emit startConnect(port,ip);//触发信号,在27行调用connectServer函数连接服务器的代码,在子线程运行}//选择文件按钮void MainWindow::on_selFile_clicked(){ QString path=QFileDialog::getOpenFileName(); if(path.isEmpty()) { QMessageBox::warning(this,"打开文件","选择的文件路径不能为空!"); return; } ui->filePath->setText(path);}//发送文件按钮void MainWindow::on_sendFile_clicked(){ emit sendFile(ui->filePath->text());}前面六行是一些基础默认设置;创建线程对象,然后实例化任务对象,调用moveToThread方法,这个任务对象就被放到线程里面了,有信号触发执行它的方法就会放到线程里面执行。这两个connect信号槽是当连接服务的按钮和发送文件的按钮被点击后会触发信号,然后在子线程执行任务对象的方法。选择文件的按钮是在主线程执行,任务类也没写它的方法。
然后第三个connect的信号是在任务类的连接函数里面,如果连接成功,任务类就会触发此信号,然后主线程就执行一个弹窗。
第四个connect的信号是在任务类的连接函数里面如果断开连接的时候就会发射此信号,主线程就会执行这些关闭资源的操作。
第五个connect是百分比的信号,显示那个控件的,它的信号是在任务类的传输文件的方法进行触发。
最后线程开启,当然肯定不是执行完才开启线程的,我们是先说完了信号槽这些一个一个的,实际上是在构造的时候就开启线程,等待信号被触发的。
服务器端
服务器端很简单,先看设计师模式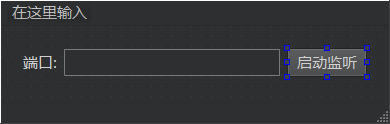
我们用的是继承QThread的方式,重写run方法创建线程,我们创建了一个recvfile的类,头文件主要如下:
xxxxxxxxxxclass RecvFile : public QThread{ Q_OBJECTpublic: explicit RecvFile(QTcpSocket*tcp,QObject *parent = nullptr);protected: void run()override;private: QTcpSocket*m_tcp;signals: void over();};
很简单,生命重写run方法,还有一个QTcpSocket*m_tcp;成员,套接字通信。还有一个over信号用来在run函数内已经接收玩数据后触发
cpp实现如下:
xxxxxxxxxxRecvFile::RecvFile(QTcpSocket*tcp,QObject *parent): QThread{parent}{ m_tcp=tcp;}void RecvFile::run(){ qDebug()<<"服务器子线程:"<<QThread::currentThread(); QFile*file =new QFile("recv.txt"); file->open(QFile::WriteOnly); //接收数据 connect(m_tcp,&QTcpSocket::readyRead,this,[=]() { static int count=0; static int total=0; if(count==0) { m_tcp->read((char*)&total,4);//读取大小 } //读取剩余的数据 QByteArray all=m_tcp->readAll(); count+=all.size(); file->write(all); //判断数据是否接收完毕了 if(count==total) { m_tcp->close(); m_tcp->deleteLater(); file->close(); file->deleteLater(); emit over(); } }); //进入事件循环 exec();}构造函数是有参构造,用于初始化私有成员。
run方法的m_tcp->read((char*)&total,4);会读取总共数据有多少字节,m_tcp->readAll();会一次性读取全部的数据;然后count+=all.size();
count得到被读取的数据的大小,然后进行比较,如果相等就证明数据读取完毕if(count==total)。然后会关闭资源和触发over信号
看mainWindow的头文件主要:
xxxxxxxxxxclass MainWindow : public QMainWindow{ Q_OBJECTpublic: MainWindow(QWidget *parent = nullptr); ~MainWindow();private slots: void on_setListen_clicked();private: Ui::MainWindow *ui; QTcpServer*m_s;};很简单,只有一个按钮槽函数和一个私有的QTcpServer*m_s;成员用于监视是是否有客户端连接,cpp实现如下
xxxxxxxxxx{    ui->setupUi(this);
    qDebug()<<"服务器主线程:"<<QThread::currentThread();
    m_s=new QTcpServer(this);
    connect(m_s,&QTcpServer::newConnection,this,[=]()    {        QTcpSocket*tcp=m_s->nextPendingConnection();        //创建子线程        RecvFile*subThread=new RecvFile(tcp);        subThread->start();
        connect(subThread,&RecvFile::over,this,[=]()        {            subThread->exit();            subThread->wait();            subThread->deleteLater();            QMessageBox::information(this,"文件接收","文件接收完毕!");        });    });}void MainWindow::on_setListen_clicked(){    unsigned short port = ui->port->text().toShort();    m_s->listen(QHostAddress::Any,port);}
先看按钮吧,就是点击之后,会获取我们输入文本框的数据,转换为short。然后调用listen方法进行监视此端口。
构造函数里面就是给m_s先实例化。然后信号:当有新的 TCP 连接,会触发 newConnection() 信号,其实之前已经说过了。
然后创建子线程,开启线程....开启了之后就会执行之前在run写的代码,当run执行完毕接收完全部的数据就会触发over自定义信号,我们进行退出事件循环,这里用exit和quit差不多都是退出事件循环,为什么呢?因为我们在run最后写了exec();
为什么要让它进入事件循环呢?因为不同于c++标准库等的线程,qt的线程函数需要等待,等待触发信号,如果不这样做,那么就直接执行完,线程就结束了,触发信号就没用了,必须设置一个信号用于退出。其他时候一直循环等待着其他信号被触发然后执行对应的方法。
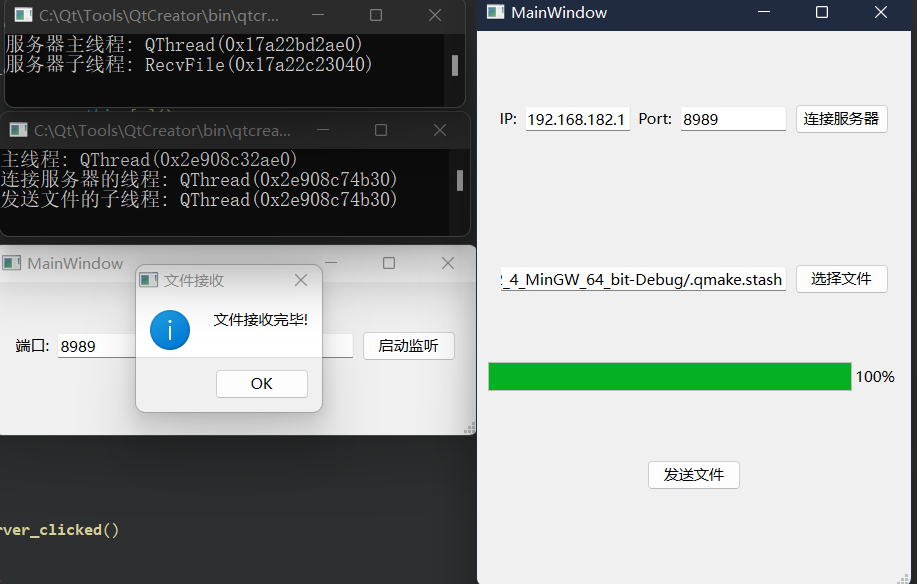
然后就是一点回收资源和提示。最后两个成品如下:
Qt事件
众所周知 Qt 是一个基于 C++ 的框架,主要用来开发带窗口的应用程序(不带窗口的也行,但不是主流)。我们使用的基于窗口的应用程序都是基于事件,其目的主要是用来实现回调(因为只有这样程序的效率才是最高的)。所以在 Qt 框架内部为我们提供了一些列的事件处理机制,当窗口事件产生之后,事件会经过:事件派发 -> 事件过滤->事件分发->事件处理几个阶段。Qt 窗口中对于产生的一系列事件都有默认的处理动作,如果我们有特殊需求就需要在合适的阶段重写事件的处理动作。
事件(event)是由系统或者 Qt 本身在不同的场景下发出的。当用户按下 / 移动鼠标、敲下键盘,或者是窗口关闭 / 大小发生变化 / 隐藏或显示都会发出一个相应的事件。一些事件在对用户操作做出响应时发出,如鼠标 / 键盘事件等;另一些事件则是由系统自动发出,如计时器事件。
每一个 Qt 应用程序都对应一个唯一的 QApplication 应用程序对象,然后调用这个对象的 exec() 函数,这样 Qt 框架内部的事件检测就开始了(程序将进入事件循环来监听应用程序的事件)。
事件处理函数的使用
事件的函数都有默认值,我们可以重写那些方法,比如QMainWindow类中的closeEvent事件处理器函数。我们可以重写如下:
xxxxxxxxxxvoid MainWindow::closeEvent(QCloseEvent *ev){ int ret=QMessageBox::question(this,"提问","您确定要关闭窗口吗?"); if(ret==QMessageBox::Yes) { ev->accept(); } else { ev->ignore(); }}加上这段代码后,我们点击关闭按钮的时候就会弹出对话框让我们选择

如果返回值==Yes那么就执行accept函数,也就是接受的意思,反之忽略;
或者我们可以重写QResizeEvent类的resizeEvent事件处理器函数,代码如下:
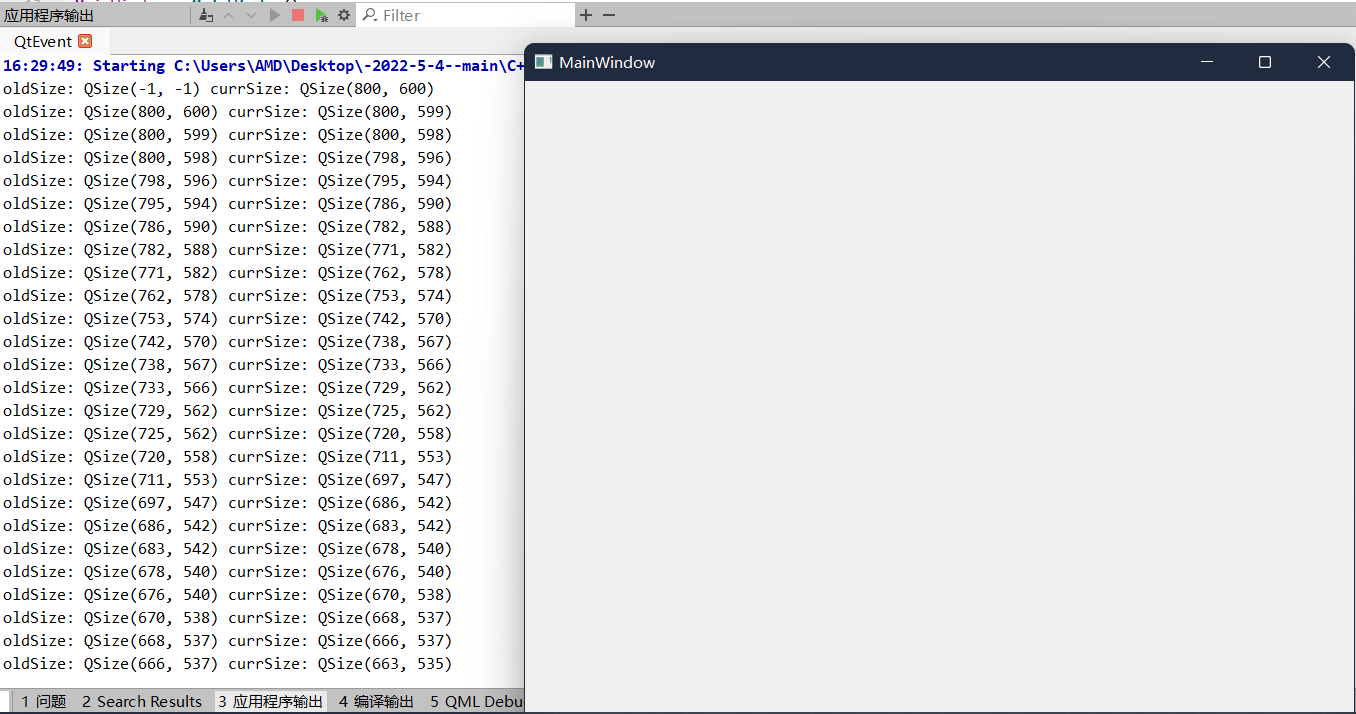
xxxxxxxxxxvoid MainWindow::resizeEvent(QResizeEvent *ev){ qDebug()<<"oldSize:"<<ev->oldSize()<<"currSize:"<<ev->size();}
xxxxxxxxxxconst QSize &QResizeEvent:: oldSize () const//返回小部件的旧尺寸。 const QSize&QResizeEvent:: size () const//返回小部件的新大小。这与QWidget::size 相同。视图如下:每次移动都会触发事件
基于事件处理器函数自定义按钮
- 从视觉上看是一个不规则的按钮(按钮实际上都是矩形的)
- 按钮上需要指定的背景图片
- 按钮在鼠标的不同操作阶段(无操作,鼠标悬停,鼠标按下)能够显示不同的背景图
头文件如下:
xxxxxxxxxxclass MyButton : public QWidget{ Q_OBJECTpublic: explicit MyButton(QWidget *parent = nullptr);protected: void mousePressEvent(QMouseEvent*ev); void mouseReleaseEvent(QMouseEvent*ev); void enterEvent(QEvent*ev); void leaveEvent(QEvent*ev); void paintEvent(QPaintEvent*ev);signals:private: //这里两种都可以 QPixmap m_pixmap;//专注于显示,显示的时候效率更高 //QImage m_imag;//主要是进行跨线程的图片传输,多线程绘图,能够实现一个像素级别的修改,QPixmap不可以。};这里的五个函数都是重写父类的QWidget的事件处理函数,看cpp文件
xxxxxxxxxx//没有被任何操作的时候,也就是默认显示MyButton::MyButton(QWidget *parent): QWidget{parent}{ setMouseTracking(true); m_pixmap.load(":/3.png"); setFixedSize(m_pixmap.size());//设置按钮的大小和图片大小一样}//点击的时候void MyButton::mousePressEvent(QMouseEvent *ev){ m_pixmap.load(":/chilun.ico"); update();//它是QWidget的槽函数会调用paintEvent重新绘制 qDebug()<<"1";}//释放的时候void MyButton::mouseReleaseEvent(QMouseEvent *ev){ m_pixmap.load(":/3.png"); update(); qDebug()<<"2";}//悬停的时候void MyButton::enterEvent(QEvent *ev){ qDebug()<<"3";// m_pixmap.load(":/done.png");// update();}//悬停鼠标离开的时候void MyButton::leaveEvent(QEvent *ev){ m_pixmap.load(":/done.png"); update(); qDebug()<<"4";}//窗口被刷新的时候调用,比如遮盖,最小化....void MyButton::paintEvent(QPaintEvent *ev){ QPainter p(this);//指定绘图设备 p.drawPixmap(rect(),m_pixmap); qDebug()<<"5";}那么控件如何添加?没有QWidget这个控件,其实我们可以在设计师模式添加父类的QWideget控件然后提升为MyButton即可,也就是自定义按钮了。
我们的ev都没有用到,编译器会提示警告,因为我们的确没有用到它,有两种解决方案,一种是去掉ev,只留下QPaintEvent*作为占位参数。或者使用一个Qt给我们提供的宏Q_UNUSED(ev)就是告诉编译器我的确没用到ev,你别警告了。
自定义按钮添加信号
只需要在MyButton类内加上一个void clicked();信号然后在点击的时候触发就行,如下:
xxxxxxxxxxvoid MyButton::mousePressEvent(QMouseEvent *ev){ m_pixmap.load(":/chilun.ico"); update(); emit clicked();}其实就是多了一个触发信号,仅此而已,然后在mainWIndow里面加上一个信号槽,如下:
xxxxxxxxxxconnect(ui->button,&MyButton::clicked,this,[=]() { QMessageBox::information(this,"按钮","物无聊无聊无聊"); });当按钮被点击的时候触发对话框。
事件的使用---案例
我们的目标是完成一个类似于一个透明的没有任何边框的,然后一堆蝴蝶在电脑上显示移动的画面
我们写了一个类butterfly。声明:
xxxxxxxxxxclass Butterfly : public QWidget{ Q_OBJECTpublic: explicit Butterfly(QWidget *parent = nullptr); void fly(); void fly(int min,int max);protected: void paintEvent(QPaintEvent*ev); void timerEvent(QTimerEvent*ev); void mouseRressEvent(QMouseEvent*ev); void mouseMoveEvent(QMouseEvent*ev); void enterEvent(QMouseEvent*ev);signals:private: QPixmap m_pixmap; int m_index=1; QPoint m_pt;};有两个自定义函数用来移动图片,五个重写的父类的事件处理器函数。私有成员变量第一个是为了切换图片,第二个是为了计数,在两个图片之间进行切换,第三个是用来计算坐标点的。
实现代码如下:
xxxxxxxxxxButterfly::Butterfly(QWidget *parent)    : QWidget{parent}{    m_pixmap.load(":/1");    //设置显示的大小和图片大小一样    setFixedSize(m_pixmap.size());
    startTimer(100);//没个100ms调用一次}void Butterfly::fly(){    fly(10,30);}void Butterfly::fly(int min, int max){    m_index++;    if(m_index>2)    {        m_index=1;    }    QString name=QString(":/%1").arg(m_index);    m_pixmap.load(name);    update();//窗口刷新,就是调用paintEvent    int stepX=QRandomGenerator::global()->bounded(min,max);    int setpY=QRandomGenerator::global()->bounded(min,max);    int curX=this->geometry().topLeft().x()+stepX;    int curY=this->geometry().topLeft().y()+setpY;    QScreen *desk=QApplication::primaryScreen();    if(curX >= desk->geometry().right())    {        curX=desk->geometry().left();    }    if(curY >= desk->geometry().bottom())    {        curY=desk->geometry().top();    }
    move(curX,curY);}//进行绘制void Butterfly::paintEvent(QPaintEvent *ev){    QPainter p(this);    p.drawPixmap(rect(),m_pixmap);}
void Butterfly::timerEvent(QTimerEvent *ev){    fly();}//鼠标左键按下void Butterfly::mouseRressEvent(QMouseEvent *ev){    //先判断是否为左键    if(ev->button()==Qt::LeftButton)    {        m_pt=ev->globalPos()-this->geometry().topLeft();//计算距离    }}//鼠标移动void Butterfly::mouseMoveEvent(QMouseEvent *ev){    if(ev->buttons()&Qt::LeftButton)    {        this->move(ev->globalPos()-m_pt);    }}void Butterfly::enterEvent(QMouseEvent *ev){    fly(-200,200);}
mainWindow主要如下:
xxxxxxxxxxButterfly*win=new Butterfly(this); win->move((width()-win->width())/2,(height()-win->height())/2); //去边框 setWindowFlags(windowFlags()|Qt::FramelessWindowHint); //设置窗口透明 setAttribute(Qt::WA_TranslucentBackground); //窗口最大化显示 showMaximized(); for(int i=0;i<100;i++) { Butterfly*win=new Butterfly(this); win->move(QRandomGenerator::global()->bounded(this->width()), QRandomGenerator::global()->bounded(this->height())); win->show(); }去除边框和窗口透明这很重要,还有最大化显示。这里用的随机数是QRandomGenerator的静态方法global然后bounded是一个重载方法,可以指定最大与最小的随机范围,或者只指定一个参数。
强调一下鼠标移动的事件,写法如下:
xxxxxxxxxxvoid MainWindow::mouseMoveEvent(QMouseEvent *event){ QString msg=QString("move: x:%1,y:%2").arg(event->x()).arg(event->y()); qDebug()<<msg;}这里只是简单的获取坐标打印,重写mouseMoveEvent事件
event事件分发器
xxxxxxxxxxvoid event(QEvent *event);//函数原型专门用来分发事件 一切事件都先交给它来判断属于谁,再分发到哪里处理事件。事件处理器函数那里讲过一些使用。
返回值是bool类型,如果返回的是true代表用户要处理这个时间,不向下分发事件了
我们可以通过event2022年6月14日22:26:53分发器 拦截事件,比如拦截鼠标按下的事件(单击),如下:
xxxxxxxxxx//先在头文件声明然后cpp实现,也就是重写,记住要先继承QWidget或者别的父类bool event(QEvent *event);//cpp:bool Butterfly::event(QEvent *event){ if(event->type()==QEvent::MouseButtonPress) { QString str = QString("Event拦截了鼠标按下"); qDebug()<<str; }}我们使用的是之前讲事件处理函数和案例的QtEvent项目,在butterfly类里实测继承QWidget的类重写event是有效的(继承QLabel也行)。也是可以被拦截触发的。
但是我们这么写是有问题的,首先,我们这样写的话,表示要拦截此类所有的事件了,没有return分发,只是说当遇到点击事件会执行我们写的QDebug()代码。如果是别的事件则全部也不会执行,如果要让它正常执行,需要交给父类处理,也就是默认处置。对于需要拦截的事件也要记得返回true。正确如下:
xxxxxxxxxxbool Butterfly::event(QEvent *event){ if(event->type()==QEvent::MouseButtonPress) { QString str = QString("Event拦截了鼠标按下"); qDebug()<<str; return true;//true代表用户自己处理这个事件,不向下分发 } //其他事件交给父类处理 默认处置 return QWidget::event(event);}QEvent::MouseButtonPress这是Qt框架里面的一个枚举的成员,Type枚举表示了很多的事件,图如下:
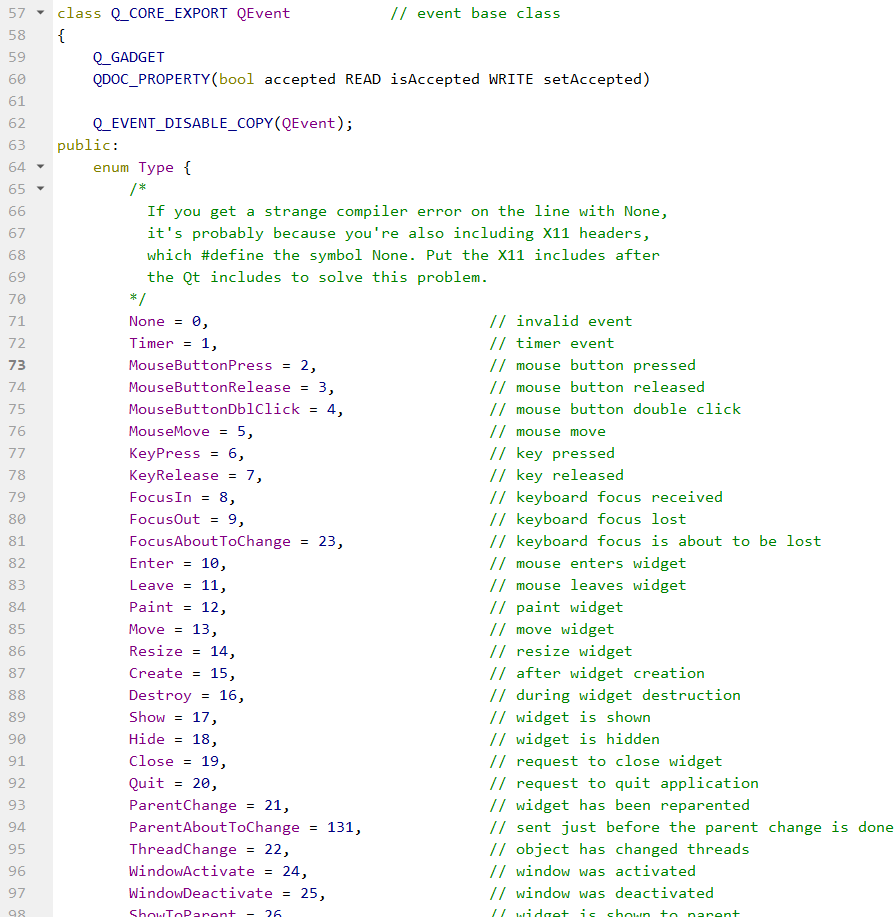
还有很多很多就不列举了。
总结它的作用:
- 用于事件的分发
- 事件的拦截(不推荐)
事件过滤器
通过事件过滤器可以在程序分发到even事件之前再做一次高级拦截。使用 两个步骤
- 给控件安装事件过滤器
- 重写eventfilter事件
xxxxxxxxxxbool Butterfly::eventfilter(QEvent *event){ if(event->type()==QEvent::MouseButtonPress) { QString str = QString("Event拦截了鼠标按下"); qDebug()<<str; return true;//true代表用户自己处理这个事件,不向下分发 } //其他事件交给父类处理 默认处置 return QWidget::eventfilter(event);}和事件分发器的使用方式一样,都是重写的,区别在于。事件过滤器会在event分发之前进行拦截
QPainter绘图
绘图事件:void paintEvent(QPaintEvent*); 需要继承QWidget,我们之前的Qt事件重写过这个
声明一个画家对象,指定绘图设备,然后即可开始绘画设置
xxxxxxxxxxvoid Widget::paintEvent(QPaintEvent *){ //实例化画家对象 this指定的是绘图设备 QPainter painter(this); //设置画笔 QPen pen(QColor(255,0,0)); //设置画笔宽度 pen.setWidth(3); //设置画笔风格 pen.setStyle(Qt::DotLine); //让画家使用这个笔 painter.setPen(pen); //设置画刷 QBrush brush(QColor(Qt::green)); //设置画刷风格 brush.setStyle(Qt::Dense7Pattern); //让画家使用画刷 painter.setBrush(brush); //画线 //painter.drawLine(QPoint(0,0),QPoint(100,100));//被淘汰了 QLineF s; s.setPoints(QPointF(0,0),QPointF(100,100)); painter.drawLine(s); //画圆 椭圆 QRect的四个参数分别是左顶宽高,表示在距离x100,y100的地方,画一个宽100高50的圆 painter.drawEllipse(QRect(100,100,100,50)); //画矩形 painter.drawRect(QRect(20,20,20,20)); //画文字 第一个参数是设置框框也就是范围,但是不会显示,只会显示第二个参数的字符串 painter.drawText(QRect(100,200,150,50),"好好学习,天天向上");}这只是举例子,有需要可以看文档。
高级设置
- 设置抗锯齿画圆
xxxxxxxxxx QPainter painter(this); painter.drawEllipse(QPoint(100,50),50,50); //设置抗锯齿能力 效率较低,但是好看 painter.setRenderHint(QPainter::Antialiasing); painter.drawEllipse(QPoint(200,50),50,50);设置移动画家
xxxxxxxxxxQPainter painter(this);//画矩形painter.drawRect(QRect(20,20,50,50));//移动画家painter.translate(100,0);//保存画家状态painter.save();//绘画painter.drawRect(QRect(20,20,50,50));//通过向量 ( dx , dy )平移坐标系。painter.translate(100,0);//还原画家保存状态painter.restore();//绘画painter.drawRect(QRect(20,20,50,50));
利用画家 画资源图片,调用绘图事件
构造函数写一个这样的信号槽,先在类的成员加上一个int posX=0;
xxxxxxxxxxconnect(ui->pushButton,&QPushButton::clicked,[=]() { posX+=20;//用作移动位置的计数 //如果要手动的调用绘图事件用upadat() emit update(); });绘图事件如下:
xxxxxxxxxxvoid Widget::paintEvent(QPaintEvent *){ QPainter painter(this); painter.drawPixmap(0,posX,QPixmap(":/xx.png"));//x y 图片 (三个参数)}每次点击按钮都会计数,然后调用绘图事件,重新绘制,posX作为参数,也就是一直移动了
绘图设备
绘图设备是指继承QPainterDevice的子类。Qt一共提供了四个这样的类,分别是QPixmap,QBitmap,QImage和QPicture。其中
QPixmap专门为图形在屏幕上的显示做了优化
xxxxxxxxxx//Pixmap绘图设备 初始化画布的大小QPixmap pix(300,300);//填充颜色 也就是设置背景色pix.fill(Qt::white);//声明画家QPainter painter(&pix);painter.setPen(QPen(Qt::green));//第一个参数是圆的圆心的位置,第二三个参数是圆的宽高painter.drawEllipse(QPoint(150,150),100,100);//保存到本地磁盘pix.save("C:/Users/AMD/Desktop/pix.png");QBitmap是QPixmap的子类,它的色深限定为1,可以使用QPixmap的isQBixmap()函数来确定这个QPixmap是不是一个QBitmap
QImage专门为图像的像素级访问做了优化
xxxxxxxxxxQImage img(300,300,QImage::Format_RGB32);img.fill(Qt::white);QPainter painter(&img);painter.setPen(QPen(Qt::blue));painter.drawEllipse(QPoint(150,150),100,100);//保存img.save("C:/Users/AMD/Desktop/img.png");普通的使用方式,不是重点,看下面:
xxxxxxxxxxvoid Widget::paintEvent(QPaintEvent *){QPainter painter(this);//利用QImage对像素进行修改QImage img;img.load(":/xx.png");//修改像素点for(int i=50;i<100;i++){for(int j=50;j<100;j++){QRgb value=qRgb(255,0,0);img.setPixel(i,j,value);}}painter.drawImage(0,0,img);}
setPixel方法就是用来修改像素点的,三个参数表示x轴y轴与颜色
QPicture则可以记录和重写QPainter的各条命令。
xxxxxxxxxx/////在构造函数这样写/////QPicture pic;QPainter Painter;Painter.begin(&pic);//开始往pic上画Painter.setPen(QPen(Qt::blue));Painter.drawEllipse(QPoint(150,150),100,100);Painter.end();//结束画画//保存到磁盘pic.save("C:/Users/AMD/Desktop/img.zt");/////绘图事件/////void Widget::paintEvent(QPaintEvent *){QPainter painter(this);QPicture pic;pic.load("C:/Users/AMD/Desktop/img.zt");painter.drawPicture(0,0,pic);}
首先我们使用QPicture正常的构造了一个对象,先调用begin方法表示开始画画,然后是正常操作,结束后调用end方法。就画完了,存到磁盘中。这个zt后缀名是随便取的,就算是png一样无法看到图片内容,它只是用来记录我们对图片的操作。
绘图事件使用QPicture的load方法可以读取本地磁盘的它所创建的文件。然后用QPainter的drawPicture方法正常显示到屏幕,如下:
QPicture并不是主要用来画图的,主要是记录操作
QFile文件操作
读:
设计师模式如下:
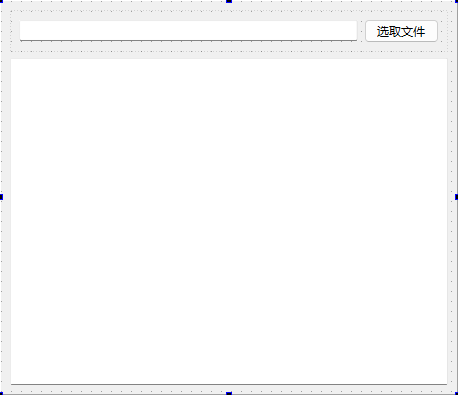
总共只有三个控件,也只需要完成读取然后显示路径显示内容。代码如下:
xxxxxxxxxx//点击选取文件按钮,弹出对话框connect(ui->pushButton,&QPushButton::clicked,[=](){ QString path=QFileDialog::getOpenFileName(this,"打开文件","C:/Users/AMD/Desktop"); ui->lineEdit->setText(path);//设置对话框显示路径 QFile file(path);//参数就是文件路径 //设置打开方式 file.open(QFile::ReadOnly); //读取全部的数据放入array QByteArray array=file.readAll(); ui->textEdit->setText(array); file.close();});值得注意的是QFile默认支持的格式是utf-8,注意转换
如果需要查看gbk文件可以改成下面这样,但是utf8也就看不了了,关于这个问题可调用一些别的api
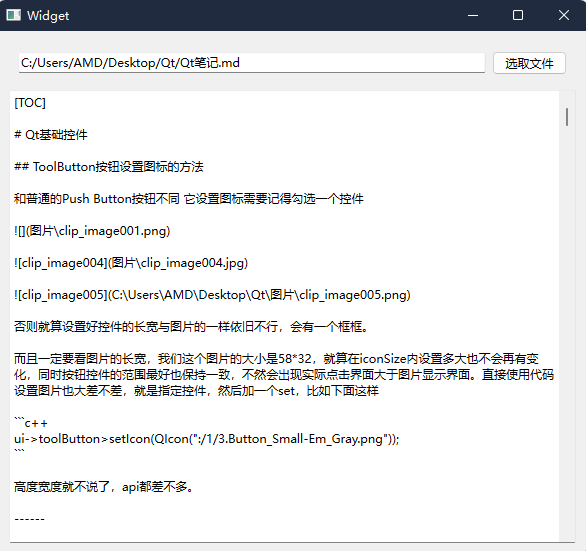
xxxxxxxxxxconnect(ui->pushButton,&QPushButton::clicked,[=]() { QString path=QFileDialog::getOpenFileName(this,"打开文件","C:/Users/AMD/Desktop"); ui->lineEdit->setText(path); //编码格式类 将一些本地编码的字符串转换为 Unicode: QTextCodec *codec = QTextCodec::codecForName("GBK"); QFile file(path);//参数就是文件路径 //设置打开方式 file.open(QFile::ReadOnly); //读取全部的数据放入array QByteArray array=file.readAll(); //array=file.readLine();//也可以按行读取 ui->textEdit->setText(codec->toUnicode(array));//从 Unicode 转换为本地编码 file.close(); });atEjd();判断文件是否为空
xxxxxxxxxxwhile(!file.atEnd()){ array+=file.readLine();//按行读取}ui->textEdit->setText(codec->toUnicode(array));读取全部的话结果如下:
关于第一个Qt框架自带控件我们可以再举例几个其他的
xxxxxxxxxx//打开目录void MainWindow::on_filedlg_clicked(){//第一种 它只能打开目录 QString dirName = QFileDialog::getExistingDirectory(this,"打开目录","D:\\自用");//父窗口 名称 默认目录 QMessageBox::information(this,"打开目录","您选择的目录是:"+dirName);//弹窗 显示我们打开的目录
//第二种 它能打开文件 QString arg("Text files (*.txt)"); //初始化过滤器 有两种选择 默认是arg的Text 最后返回打开文件的绝对路径 QString fileName=QFileDialog::getOpenFileName( this,tr("OPen FIle"),"D://自用", tr("Images9(*.png *.jpg);;Text files (*.txt)"),&arg); //打印显示 QMessageBox::information(this,"打开文件","您选择的文件夹是:"+fileName);
//第三种 它能打开多个文件遍历 //这里由于于没有创建arg 也就不是没有默认值 而是第一个Images9 同时QStringList相当于有一堆QString的列表 QStringList fileNames=QFileDialog::getOpenFileNames(//getOpenFileNames和上面那个相比只是多了一个s 但是返回的类型变成了QStringList this,tr("OPen FIle"),"D://自用", tr("Images9(*.png *.jpg);;Text files (*.txt)")); QString names; for(int i=0;i<fileNames.size();++i) { names+=fileNames[i]+"\n"; } QMessageBox::information(this,"打开文件(s)","您选择的文件夹是:"+names);//第四种 用来覆盖已有文件 或者自己写一个文件 不过这些都是不存在的 这个对话框只是用来找路径的 QString fileName=QFileDialog::getSaveFileName(this,"保存的文件","D:\\"); QMessageBox::information(this,"保存文件","您指定的保存数据的文件是:"+fileName);
}
写:
xxxxxxxxxxfile.open(QFile::Append);//使用追加的方式写file.write("啊啊啊啊啊");file.close();非常简单,用write方法即可,默认写入的是utf-8编码
QFileIfo文件信息读取
xxxxxxxxxxQFileInfo info(path);qDebug()<<"大小:"<<info.size()<<"后缀名:"<<info.suffix()<<"文件名称:"<<info.fileName()<<"文件路径:"<<info.path();qDebug()<<"创建日期:"<<info.birthTime().toString("yyyy/MM/dd hh:mm:ss");还有很多APi可以查看文档
Qt的多媒体模块multimedia
Qt6中已经没有QSound类,播放音频需要使用QSoundEffect类QT += multimedia
首先在.pro文件中添加multimedia模块
使用方法:
xxxxxxxxxxQSoundEffect * startSound = new QSoundEffect(this);startSound->setSource(QUrl::fromLocalFile(":/i.wav"));startSound->play();最简单的就是这样播放音乐
下面我们根据文档来稍微介绍一些操作:
这个例子展示了如何播放一个循环的、有点安静的声音效果:
xxxxxxxxxxQSoundEffect * startSound = new QSoundEffect(this);startSound->setSource(QUrl::fromLocalFile(":/i.wav"));startSound->setLoopCount(QSoundEffect::Infinite);startSound->setVolume(0.1f);startSound->play();void QSoundEffect::setLoopCount(int loopCount)
将播放此音效的总次数设置为loopCount。
将循环计数设置为 0 或 1 意味着音效将只播放一次;通过QSoundEffect::Infinite无限重复。播放音效时可以更改循环计数,在这种情况下,它将将剩余循环更新为新的loopCount。我们上面就是这样
void QSoundEffect:: setMuted ( bool muted )
设置是否静音此音效的播放。
如果muted为 true,则播放将静音(静音),否则将以当前指定的音量() 进行播放。
QUrl QSoundEffect:: source () const
返回当前播放源的 URL
注意:属性源的 Getter 函数。
另请参见setSource ()。
qreal QSoundEffect:: volume () const
返回此音效的当前音量,从 0.0(静音)到 1.0(最大音量)。
注意:属性卷的 Getter 函数。
另请参见setVolume ()
具体看文档,我们举一个实际应用的例子,按钮触发
xxxxxxxxxxconnect(ui->pushButton,&QPushButton::clicked,[=]() { startSound->play(); });connect(ui->pushButton_2,&QPushButton::clicked,[=]() { startSound->stop(); });点击停止按钮后可以继续点击播放,但是会从头再来。
它还有众多的信号,我们不再介绍,可以查看文档
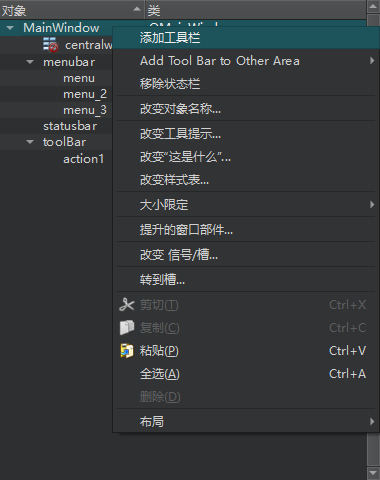
案例QAction
首先为我们需要在在视图加一个工具栏,像下面这样选中主窗口右击添加工具栏
xxxxxxxxxxRC_ICONS += chilun.ico//在pro文件加入图标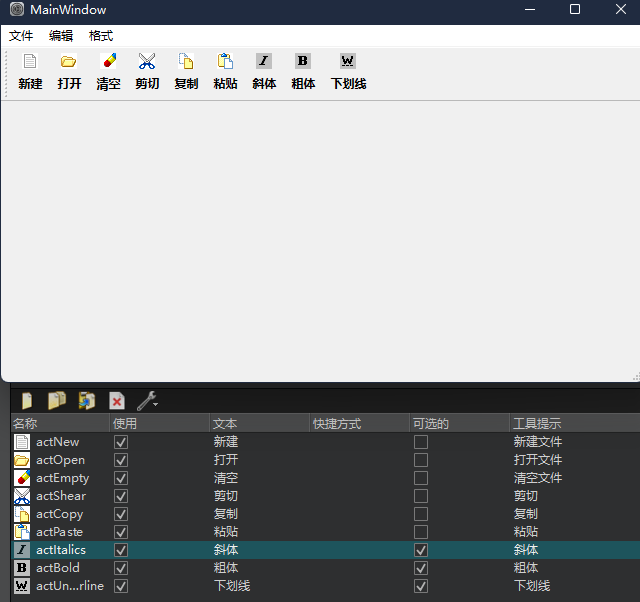
先设置好基础的控件按钮,这里的可选的意思是点击后有反馈,就是两种模式
实际上不止这些,成品是下面这样:
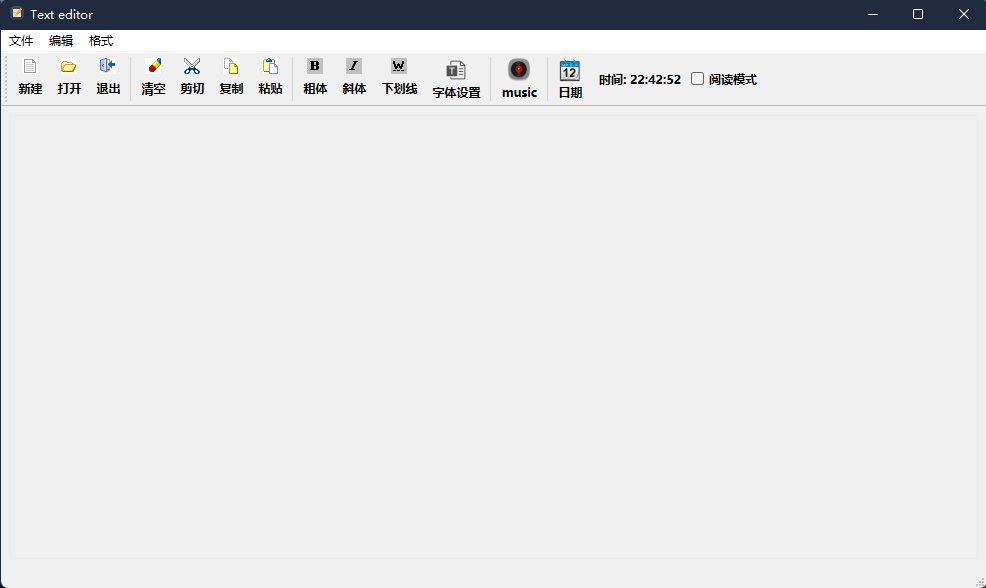
代码在Project项目内,我们说几个功能
xxxxxxxxxx//播放音乐的槽函数,QAction按钮控制,有两种状态,进行图标的更改和音乐的暂停void MainWindow::on_actMusic_triggered(bool checked){ if(checked) { ui->actMusic->setIcon(QIcon(":/images/stop.png")); startSound->play(); } else { ui->actMusic->setIcon(QIcon(":/images/music.png")); startSound->stop(); }}//但是一定要注意给播放音乐的对象初始化,在构造函数,至于对象创建在类里面就行,因为如果写在函数里,每次触发都是一个新的对象this->startSound = new QSoundEffect(this);startSound->setSource(QUrl::fromLocalFile(":/images/xia.wav"));添加QCheckBox控件到工具栏使用,对QLabel进行只读的控制
xxxxxxxxxx QCheckBox*check=new QCheckBox; check->setText("阅读模式");//设置标题 ui->toolBar->addWidget(check);//放入工具栏 connect(check,&QCheckBox::clicked,[=](bool choose){ if(choose) { ui->textEdit->setEnabled(false); } else { ui->textEdit->setEnabled(true); } });一些其他操作如下:
xxxxxxxxxx//新建文件void MainWindow::on_actNew_triggered(){    QString path =QInputDialog::getText(this,"新建文件","请输入文件名和路径",QLineEdit::Normal,"C:/Users/AMD/Desktop");    QFile file(path);    file.open(QFile::WriteOnly);    file.close();    //QMessageBox::information(this,"path","您的文件位于"+path);    this->Path=path;    ui->textEdit->setEnabled(true);    ui->textEdit->setPlaceholderText("请输入:");}
//保存文件void MainWindow::on_actionsave_triggered(){    QFile file(Path);//魔鬼细节,这里用的类的Path    file.open(QFile::WriteOnly|QFile::Truncate );//注意Truncate不能单独使用    file.write(ui->textEdit->toPlainText().toUtf8());    file.close();}//读取文件数据返回QByteArray MainWindow::fileRead(){    QFile file(Path);    file.open(QFile::ReadOnly);    QByteArray array=file.readAll();    return array;}//打开文件void MainWindow::on_actOpen_triggered(){    QString path=QFileDialog::getOpenFileName(this,"打开文件","C:/Users/AMD/Desktop");    this->Path=path;    ui->textEdit->setText(fileRead());    ui->textEdit->setEnabled(true);}//删除文件void MainWindow::on_actDeleteFile_triggered(){    //QString path=QFileDialog::getOpenFileName(this,"删除文件","C:/Users/AMD/Desktop");    QFile file(Path);    bool c=file.remove();    if(c==false)    {        QMessageBox::information(this,"删除文件","删除文件失败!!");    }    ui->textEdit->setText("");    ui->textEdit->setEnabled(false);//设置不可编辑    ui->textEdit->setPlaceholderText("请创建或打开一个新文件:");}//清空void MainWindow::on_actEmpty_triggered(){    ui->textEdit->setText("");}//剪切void MainWindow::on_actShear_triggered(){    //通过QClipboard类设置剪贴板    QClipboard *clip = QApplication::clipboard();    QString data=ui->textEdit->textCursor ().selectedText ();    clip->setText(data);    ui->textEdit->setText("");}//复制void MainWindow::on_actCopy_triggered(){    QClipboard *clip = QApplication::clipboard();    QString data=ui->textEdit->textCursor ().selectedText ();    clip->setText(data);}//粘贴void MainWindow::on_actPaste_triggered(){    QClipboard *clip = QApplication::clipboard();    QString data=clip->text();//获取剪贴板的内容    ui->textEdit->textCursor().insertText(data);//在光标后进行追加}//设置选中粗体void MainWindow::on_actBold_triggered(bool checked){    QTextCharFormat fmt;    if(checked)    {        fmt.setFontWeight(QFont::Bold);    }    else    {        fmt.setFontWeight(QFont::Normal);    }    ui->textEdit->mergeCurrentCharFormat(fmt);}//设置选中斜体void MainWindow::on_actItalics_triggered(bool checked){    QTextCharFormat fmt;    if(checked)    {        fmt.setFontItalic(checked);    }    else    {        fmt.setFontItalic(checked);    }    ui->textEdit->mergeCurrentCharFormat(fmt);}//设置选中字体void MainWindow::on_setFont_triggered(){    bool ok;    QFont ft = QFontDialog::getFont(&ok,QFont("微软雅黑",12,QFont::Bold),this,"选择字体");    ui->textEdit->setFont(ft);}//设置选中文下划线void MainWindow::on_actUnderline_toggled(bool arg1){    QTextCharFormat fmt;    fmt.setFontUnderline(arg1);    ui->textEdit->mergeCurrentCharFormat(fmt);}//关闭程序void MainWindow::on_actClose_triggered(){    int ret = QMessageBox::question(this,"退出","你要保存修改的文件内容再退出吗?",//?号                                    QMessageBox::Save | QMessageBox::Cancel,QMessageBox::Save);    if(ret==QMessageBox::Save)    {        on_actionsave_triggered();        MainWindow::close();    }    else if(ret ==QMessageBox::Cancel)    {        MainWindow::close();    }}
其他数值输入和显示组件:
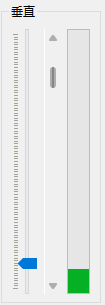
使用QSlider控件
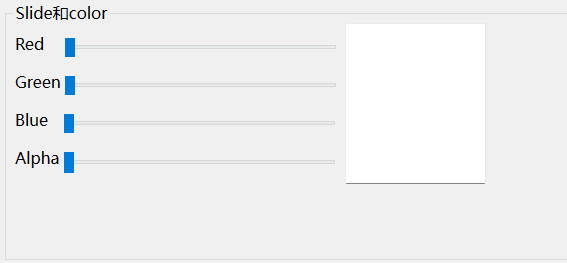
我们要像图上一样用四个QSlider控件控制Qlabel的颜色
xxxxxxxxxx//先写了一个槽函数,我们是直接选择了valueChanged(int)信号转到void MainWindow::on_horizontalSlider_valueChanged(int value){ QPalette pal=ui->textEdit->palette(); QColor color; color.setRgb(ui->horizontalSlider->value(),ui->horizontalSlider_2->value(), ui->horizontalSlider_3->value(),ui->horizontalSlider_4->value()); pal.setColor(QPalette::Base,color); ui->textEdit->setPalette(pal);}//我们完全没必要重复造轮子,剩下的三个控件使用connect构造函数连接即可,如下: connect(ui->horizontalSlider_2,&QSlider::valueChanged,this,this->on_horizontalSlider_valueChanged); connect(ui->horizontalSlider_3,&QSlider::valueChanged,this,this->on_horizontalSlider_valueChanged); connect(ui->horizontalSlider_4,&QSlider::valueChanged,this,this->on_horizontalSlider_valueChanged使用QDial联动QLCDNumber,如图:
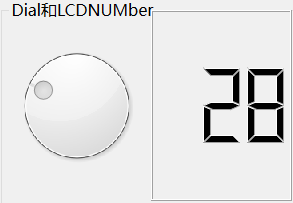
其实就是使用这个轮盘来操作LCD显示的数字,非常简单
xxxxxxxxxx//使用的valueChanged(int)信号转到,和前面一样void MainWindow::on_dial_valueChanged(int value){ ui->LCDDisplay->display(value);}QSlider控件操作QProgressBar
xxxxxxxxxx//使用valueChanged(int)信号,依旧是一行代码void MainWindow::on_SliderV_valueChanged(int value){ ui->progBarV->setValue(value);}
QRadioButton控制QLCDNumber
如图:

xxxxxxxxxx//2进制void MainWindow::on_radioButton_clicked(){ ui->LCDDisplay->setDigitCount(8);//设置位数 ui->LCDDisplay->setBinMode();//设置进制}//8进制void MainWindow::on_radioButton_2_clicked(){ ui->LCDDisplay->setDigitCount(4); ui->LCDDisplay->setOctMode();}//10进制void MainWindow::on_radioButton_3_clicked(){ ui->LCDDisplay->setDigitCount(3); ui->LCDDisplay->setDecMode();}//16进制void MainWindow::on_radioButton_4_clicked(){ ui->LCDDisplay->setDigitCount(3); ui->LCDDisplay->setHexMode();}
时间日期与定时器
先看成品,如下:
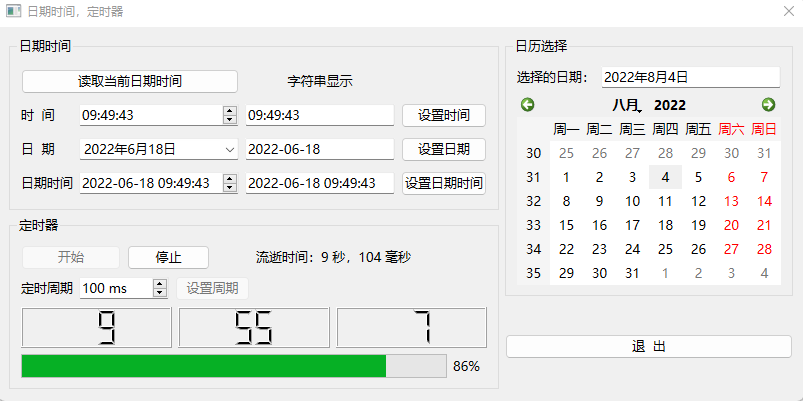
当成三个部分就行,我们先看读取当前日期时间:
xxxxxxxxxxvoid Dialog::on_btnGetTime_clicked(){ //获取当前日期时间,为三个专用编辑器设置日期时间数据,并转换为字符串在LineEdit里显示    QDateTime curDateTime=QDateTime::currentDateTime(); //读取当前日期时间
    ui->timeEdit->setTime(curDateTime.time()); //设置时间    ui->editTime->setText(curDateTime.toString("hh:mm:ss"));//转换为字符串显示
    ui->dateEdit->setDate(curDateTime.date());//设置日期    ui->editDate->setText(curDateTime.toString("yyyy-MM-dd"));//转换为字符串显示
    ui->dateTimeEdit->setDateTime(curDateTime);//设置日期时间    ui->editDateTime->setText(curDateTime.toString("yyyy-MM-dd hh:mm:ss"));//转换为字符串显示}
总共给6个控件显示时间或日期,三个是一些特有的控件:QTimeEdit,QDateEdit,QDataTimeEdit。分别是显示时间,日期,时间日期的。另外三个都是Q:ineEdit,我们格式化字符串显示即可
还有三个按钮是设置时间,设置日期,设置日期时间如下:
xxxxxxxxxxvoid Dialog::on_btnSetTime_clicked(){ //字符串转换为QTime    QString str=ui->editTime->text(); //读取字符串表示的时间    //    str=str.trimmed();//去掉空格    if (!str.isEmpty())    {        QTime tm=QTime::fromString(str,"hh:mm:ss"); //从字符串转换为QTime        ui->timeEdit->setTime(tm); //设置时间    }}
void Dialog::on_btnSetDate_clicked(){//字符串转换为 QDate    QString str=ui->editDate->text(); //读取字符串表示的日期//    str=str.trimmed();//去掉空格    if (!str.isEmpty())    {        QDate dt=QDate::fromString(str,"yyyy-MM-dd");//从字符串转换为 QDate        ui->dateEdit->setDate(dt);//设置日期    }}void Dialog::on_btnSetDateTime_clicked(){//字符串转换为 QDateTime    QString str=ui->editDateTime->text();//读取字符串表示的日期    str=str.trimmed();//去掉空格    if (!str.isEmpty())    {        QDateTime datetime=QDateTime::fromString(str,"yyyy-MM-dd hh:mm:ss"); //从字符串转换为 QDateTime        ui->dateTimeEdit->setDateTime(datetime);//设置日期时间    }}
第二部分日历选择显示:
xxxxxxxxxx//注意日历是QCalendarWidget控件,点击日期会触发selectionChanged信号void Dialog::on_calendarWidget_selectionChanged(){ //在日历上选择日期 QDate dt=ui->calendarWidget->selectedDate(); //读取选择的日期时间 QString str=dt.toString("yyyy年M月d日");//转换为字符串 ui->editCalendar->setText(str); //字符串显示日期}第三部分定时器等:
xxxxxxxxxx//构造函数实例化定时器开启 fTimer是QTimer *类型fTimer=new QTimer(this);  //创建定时器fTimer->stop();fTimer->setInterval(1000);//设置定时周期,单位:毫秒connect(fTimer,SIGNAL(timeout()),this,SLOT(on_timer_timeout())); //关联定时器的信号与槽
//关联的槽函数如下:void Dialog::on_timer_timeout(){ //定时器中断响应槽函数    QTime curTime=QTime::currentTime(); //获取当前时间    ui->LCDHour->display(curTime.hour()); //显示  小时    ui->LCDMin->display(curTime.minute());//显示  分钟    ui->LCDSec->display(curTime.second());//显示  秒    int va=ui->progressBar->value(); //读取progressBar的数值    va++;    if (va>100)        va=0;    ui->progressBar->setValue(va); //设置progressBar的数值}
定时器每次触发的时候同时对进度控件progressBar进行增加,我们这这里设置的是一秒。每次也会控制三个LCD显示更新后的时间。
设置定时器的周期:
xxxxxxxxxxvoid Dialog::on_btnSetIntv_clicked(){ //设置定时器周期 fTimer->setInterval(ui->spinBoxIntv->value()); //设置定时器的周期}调用QTimer的setInterval方法设置定时器周期,设置为从QspinBox控件上获取值。
定时器的开启和停止按钮
xxxxxxxxxxvoid Dialog::on_btnStart_clicked(){ fTimer->start();//定时器开始工作 fTimeCounter=QDateTime::currentDateTime();//计时器开始工作//更新各按键的状态 ui->btnStart->setEnabled(false); ui->btnStop->setEnabled(true); ui->btnSetIntv->setEnabled(false);}void Dialog::on_btnStop_clicked(){ fTimer->stop(); //定时器停止 QDateTime end=QDateTime::currentDateTime(); int tmMsec=fTimeCounter.msecsTo(end); int ms=tmMsec%1000; //余数毫秒 int sec=tmMsec/1000; //整秒 QString str=QString::asprintf("流逝时间:%d 秒,%d 毫秒",sec,ms); ui->LabElapsTime->setText(str); //显示流逝的时间 ui->btnStart->setEnabled(true); //更新按键状态 ui->btnStop->setEnabled(false); ui->btnSetIntv->setEnabled(true);}点击开始按钮之后把自己和设置周期两个按钮设置为不可使用状态setEnabled(false);方法。其他也没啥好说的。设置流逝的时间。
最后强调,计时器因为QTime的start方法被删除
我们使用QDateTime类先使用QDateTime::currentDateTime();获取当前日期时间,然后再QDateTime end=QDateTime::currentDateTime();获取结束的时间,然后int tmMsec=fTimeCounter.msecsTo(end);即可获得两个时间之间有多少毫秒
QComBox和QPainTextEdot
QComBox
Qt5.9C++开发指南91面详细介绍了它,我们举个简单的例子:
xxxxxxxxxx//先使用QMap赋值然后foreach遍历放入QComBox控件中 QComboBox*c=new QComboBox; QMap<QString,int>Zone; Zone.insert("北京",10); Zone.insert("上海",20); Zone.insert("天津",30); foreach(QString str,Zone.keys()) { ui->comboBox->addItem(str,Zone.value(str)); }//当选项改变的时候触发此信号,获取当前QComboBox的值,设置给QPainTextEditvoid MainWindow::on_comboBox_currentIndexChanged(int index){ ui->lineEdit->setText(ui->comboBox->itemText(index));}QPainTextEdot
QPlainTextEdit 可以理解为 QTextEdit的低配版。QPlainTextEdit支持纯文本显示,QTextEdit支持富文本显示。就是多一个样式。 QPlainTextEdit显示的效率比QTextEdit高,如果需要显示大量文字,尤其是需要滚动条来回滚动的时候,QPlainTextEdit要好很多。
xxxxxxxxxxui->textEdit->setContextMenuPolicy(Qt::CustomContextMenu);//设置QTextEdit控件
QMdiArea类

像这种多个窗口嵌入一个子窗口的需要用到QMdiArea,也很简单

在设计师模式放入一个MdiArea控件,和一个工具栏的动作,用于创建
在mainWindow的构造函数写如下:
xxxxxxxxxxthis->setCentralWidget(ui->mdiArea);//填满工作区this->setWindowState(Qt::WindowMaximized);//设置默认显示为屏幕大小给按钮添加一个槽处理
xxxxxxxxxxvoid MainWindow::on_action_triggered(){ Test*test=new Test(this); test->setWindowFlags(Qt::CustomizeWindowHint | Qt::WindowMinimizeButtonHint | Qt::WindowMaximizeButtonHint);//去掉子窗口的默认按钮等控件 ui->mdiArea->setViewMode(QMdiArea::TabbedView);//多页显示模式 ui->mdiArea->addSubWindow(test); ui->mdiArea->setTabsClosable(true);//设置页面可以关闭 test->show();}这里的Test是一个设计师界面类,用来显示在我们主窗口的,做子窗
QTabeView
用于显示表格状数据,适用于二维表格型数据操作
一般设计师模式放一个这个控件,还需要一个数据模型一个选择模型
xxxxxxxxxxQStandardItemModel *theModel;//数据模型QItemSelectionModel *theSelection;//Item选择模型数据模型可以用来设置行列之类的,QTableView对象调用setModel()方法传入数据模型即可设置
差不多像下面这样在构造函数给这些东西初始化
xxxxxxxxxxtheModel = new QStandardItemModel(5,FixedColumnCount,this); //创建数据模型 QStringList headerList; headerList<<"Depth"<<"Measured Depth"<<"Direction"<<"Offset"<<"Quality"<<"Sampled"; theModel->setHorizontalHeaderLabels(headerList); //设置表头文字 theSelection = new QItemSelectionModel(theModel);//Item选择模型 connect(theSelection,SIGNAL(currentChanged(QModelIndex,QModelIndex)), this,SLOT(on_currentChanged(QModelIndex,QModelIndex))); //为tableView设置数据模型 ui->tableView->setModel(theModel); //设置数据模型 ui->tableView->setSelectionModel(theSelection);//设置选择模型
三角函数
正弦sin,余弦cos,正切tan
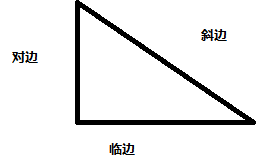
sin x=对边/斜边 sin30度=a/2a,a是对边,2a是斜边,所以sin30度=1/2
cos x=邻边/斜边 cos30度=√3 a/2a=√3/2
tan x=对边/邻边 tan30度=a/√3 a=√3/3
三十度所对的直角边等于斜边的一半
勾股定理:三角形,a的二次方+b的的二次方=c的二次方,c为斜边。如果知道斜边可以反推为a的边长等于c的二次方减b的二次方然后开根号
这里的sin cos tan都是代表的角的一个值,而不是三角形具体的某一个角,比如一个三角形可以有sin45,sin90,对边比斜边是角的对边和斜边,而不是固定的两条边
Qt Http
QT中提供了http网络接口,由QNetworkAccessManager,QNetworkRequest,QNetworkReply三部分组成。
QNetworkRequest用于组件请求,包括请求头,请求内容。QNetworkAccessManager用于发出请求,常用的有get,post两个接口,参数就是QNetworkRequest,返回结果由QNetworkReply*。
这里要注意的是QNetworkAccessManager刚得到的QNetworkReply*还不能使用,因为请求未必收到了服务端的应答,所以要绑定QNetworkReply的信号finished来判断服务是否返回,这个信号返回之后我们再对QNetworkReply进行处理,比如查看是否有网络错误,http返回的code和获取返回内容。
注意加上
xxxxxxxxxxQT += network学的不多,先跳过
QGraphicsView绘图架构
完成好的如下:
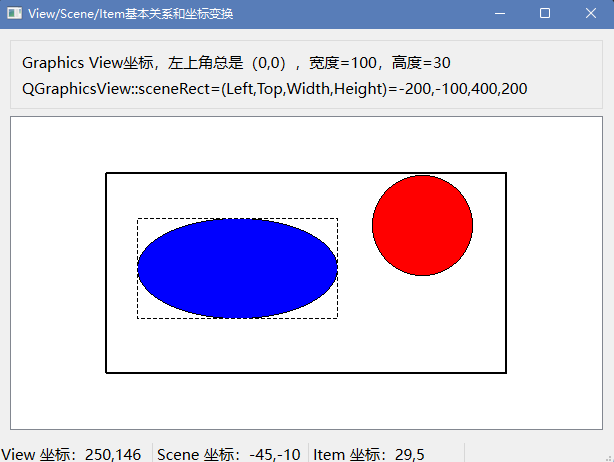
可以任意移动这两个东西,同时在左下角显示坐标
首先我们创建了一个类,它继承自QGraphicsView,
qwgraphicsview.h删减版
xxxxxxxxxxclass QWGraphicsView : public QGraphicsView{    Q_OBJECTprotected:    void mouseMoveEvent(QMouseEvent *event);    void mousePressEvent(QMouseEvent *event);public:    QWGraphicsView(QWidget *parent = 0);
signals: void mouseMovePoint(QPoint point); void mouseClicked(QPoint point);};我们可以看到继承了QGraphicsView重写了两个事件,信号声明了一下,这两个事件是移动和点击
qwgraphicsview.cpp删减版
xxxxxxxxxxvoid QWGraphicsView::mouseMoveEvent(QMouseEvent *event){//鼠标移动事件 QPoint point=event->pos(); //QGraphicsView的坐标 emit mouseMovePoint(point); //释放信号 QGraphicsView::mouseMoveEvent(event);//调用原来类封装好的虚函数}void QWGraphicsView::mousePressEvent(QMouseEvent *event){ //鼠标左键按下事件 if (event->button()==Qt::LeftButton) { QPoint point=event->pos(); //QGraphicsView的坐标 emit mouseClicked(point);//释放信号 } QGraphicsView::mousePressEvent(event);//调用原来类封装好的虚函数}看mainwindow
xxxxxxxxxxnamespace Ui {class MainWindow;}class MainWindow : public QMainWindow{ Q_OBJECTprivate: QGraphicsScene *scene; QLabel *labViewCord; QLabel *labSceneCord; QLabel *labItemCord; void iniGraphicsSystem(); //创建Graphics View的各项protected: void resizeEvent(QResizeEvent *event);public: explicit MainWindow(QWidget *parent = 0); ~MainWindow();private slots: void on_mouseMovePoint(QPoint point); void on_mouseClicked(QPoint point);private: Ui::MainWindow *ui;};// MAINWINDOW_H
xxxxxxxxxx//hvoid iniGraphicsSystem(); //创建Graphics View的各项//cppvoid MainWindow::iniGraphicsSystem(){ //构造Graphics View的各项 QRectF rect(-200,-100,400,200); scene=new QGraphicsScene(rect); //scene逻辑坐标系定义 ui->View->setScene(scene);//画一个矩形框,大小等于scene QGraphicsRectItem *item=new QGraphicsRectItem(rect); //矩形框正好等于scene的大小 item->setFlags(QGraphicsItem::ItemIsSelectable //可选,可以有焦点,但是不能移动 | QGraphicsItem::ItemIsFocusable); QPen pen; pen.setWidth(2); item->setPen(pen);// item->setPos(500,0);//缺省位置在scene的(0,0) scene->addItem(item);//一个位于scene中心的椭圆,测试局部坐标 QGraphicsEllipseItem *item2=new QGraphicsEllipseItem(-100,-50,200,100); //矩形框内创建椭圆,绘图项的局部坐标,左上角(-100,-50),宽200,高100 item2->setPos(0,0); item2->setBrush(QBrush(Qt::blue)); item2->setFlags(QGraphicsItem::ItemIsMovable | QGraphicsItem::ItemIsSelectable | QGraphicsItem::ItemIsFocusable); scene->addItem(item2);//一个圆,中心位于scene的边缘 QGraphicsEllipseItem *item3=new QGraphicsEllipseItem(-50,-50,100,100); //矩形框内创建椭圆,绘图项的局部坐标,左上角(-100,-50),宽200,高100 item3->setPos(rect.right(),rect.bottom()); item3->setBrush(QBrush(Qt::red)); item3->setFlags(QGraphicsItem::ItemIsMovable | QGraphicsItem::ItemIsSelectable | QGraphicsItem::ItemIsFocusable); scene->addItem(item3); scene->clearSelection();// item->setSelected(true);// ui->View->setDragMode(QGraphicsView::RubberBandDrag);}#include "mainwindow.h" void MainWindow::iniGraphicsSystem(){ //构造Graphics View的各项 QRectF rect(-200,-100,400,200); scene=new QGraphicsScene(rect); //scene逻辑坐标系定义 ui->View->setScene(scene);
//画一个矩形框,大小等于scene QGraphicsRectItem *item=new QGraphicsRectItem(rect); //矩形框正好等于scene的大小 item->setFlags(QGraphicsItem::ItemIsSelectable //可选,可以有焦点,但是不能移动 | QGraphicsItem::ItemIsFocusable); QPen pen; pen.setWidth(2); item->setPen(pen);// item->setPos(500,0);//缺省位置在scene的(0,0) scene->addItem(item);
//一个位于scene中心的椭圆,测试局部坐标 QGraphicsEllipseItem *item2=new QGraphicsEllipseItem(-100,-50,200,100); //矩形框内创建椭圆,绘图项的局部坐标,左上角(-100,-50),宽200,高100 item2->setPos(0,0); item2->setBrush(QBrush(Qt::blue)); item2->setFlags(QGraphicsItem::ItemIsMovable | QGraphicsItem::ItemIsSelectable | QGraphicsItem::ItemIsFocusable); scene->addItem(item2);
//一个圆,中心位于scene的边缘 QGraphicsEllipseItem *item3=new QGraphicsEllipseItem(-50,-50,100,100); //矩形框内创建椭圆,绘图项的局部坐标,左上角(-100,-50),宽200,高100 item3->setPos(rect.right(),rect.bottom()); item3->setBrush(QBrush(Qt::red)); item3->setFlags(QGraphicsItem::ItemIsMovable | QGraphicsItem::ItemIsSelectable | QGraphicsItem::ItemIsFocusable); scene->addItem(item3);
scene->clearSelection();// item->setSelected(true);
// ui->View->setDragMode(QGraphicsView::RubberBandDrag);}void MainWindow::resizeEvent(QResizeEvent *event){ //窗口变化大小时的事件 Q_UNUSED(event);//Graphics View坐标,左上角总是(0,0),宽度=,长度= ui->labViewSize->setText(QString::asprintf("Graphics View坐标,左上角总是(0,0),宽度=%d,高度=%d", ui->View->width(),ui->View->height()));
QRectF rectF=ui->View->sceneRect(); //Scene的矩形区 ui->LabSceneRect->setText(QString::asprintf("QGraphicsView::sceneRect=(Left,Top,Width,Height)=%.0f,%.0f,%.0f,%.0f", rectF.left(),rectF.top(),rectF.width(),rectF.height()));}MainWindow::MainWindow(QWidget *parent) : QMainWindow(parent), ui(new Ui::MainWindow){ ui->setupUi(this);
labViewCord=new QLabel("View 坐标:"); labViewCord->setMinimumWidth(150); ui->statusBar->addWidget(labViewCord);
labSceneCord=new QLabel("Scene 坐标:"); labSceneCord->setMinimumWidth(150); ui->statusBar->addWidget(labSceneCord);
labItemCord=new QLabel("Item 坐标:"); labItemCord->setMinimumWidth(150); ui->statusBar->addWidget(labItemCord);
ui->View->setCursor(Qt::CrossCursor); ui->View->setMouseTracking(true); ui->View->setDragMode(QGraphicsView::RubberBandDrag);
QObject::connect(ui->View,SIGNAL(mouseMovePoint(QPoint)), this, SLOT(on_mouseMovePoint(QPoint)));
QObject::connect(ui->View,SIGNAL(mouseClicked(QPoint)), this, SLOT(on_mouseClicked(QPoint)));
iniGraphicsSystem();}MainWindow::~MainWindow(){ delete ui;}void MainWindow::on_mouseMovePoint(QPoint point){//鼠标移动事件,point是 GraphicsView的坐标,物理坐标 labViewCord->setText(QString::asprintf("View 坐标:%d,%d",point.x(),point.y())); QPointF pointScene=ui->View->mapToScene(point); //转换到Scene坐标 labSceneCord->setText(QString::asprintf("Scene 坐标:%.0f,%.0f", pointScene.x(),pointScene.y()));}void MainWindow::on_mouseClicked(QPoint point){//鼠标单击事件 QPointF pointScene=ui->View->mapToScene(point); //转换到Scene坐标 QGraphicsItem *item=NULL; item=scene->itemAt(pointScene,ui->View->transform()); //获取光标下的绘图项 if (item != NULL) //有绘图项 { QPointF pointItem=item->mapFromScene(pointScene); //转换为绘图项的局部坐标 labItemCord->setText(QString::asprintf("Item 坐标:%.0f,%.0f", pointItem.x(),pointItem.y())); }}
Qt连接mysql查询
如何编译和配置环境就不说了,记得在pro文件加上
xxxxxxxxxxQT +=SQLxxxxxxxxxx QStringList drivers = QSqlDatabase::drivers(); foreach(QString driver, drivers) qDebug()<<driver; //遍历打印可用的数据库类型
QSqlDatabase db=QSqlDatabase::addDatabase("QMYSQL"); //设置连接信息 db.setHostName("localhost");//ip如果是本地可以不写,或者写主机名,比如localhost db.setUserName("root");//用户名 db.setPassword("123456");//密码 db.setDatabaseName("itcast");//数据库名
if(db.open()==false){ QMessageBox::warning(this,"错误",db.lastError().text());//lastError返回的是一个QSqlError对象,调用text方法转换,即显示报错信息 } QString sql="select * from emp2"; QSqlQuery query;//创建执行SQl的对象 query.exec(sql);//sql语句 QStringList Text; while(query.next())//next方法如果遍历到最后一条信息则为false退出循环 { QString text; text+=query.value("id").toString(); text+="\t"+query.value("name").toString(); text+="\t"+query.value("age").toString(); text+="\t"+query.value("job").toString(); text+="\t"+query.value("salary").toString(); text+="\t"+query.value("entrydate").toString(); text+="\t"+query.value("managerid").toString(); text+="\t"+query.value("dept_id").toString(); Text.append(text+"\n"); }
for(auto i:Text) ui->textEdit->append(i);//循环遍历显示出来 db.close();//关闭数据库value方法要输入的是字段名,我们为了方便字段名后面全部转为了String,其实也可以转成int之类的。
Qt中数据库的事务操作
和普通的mysql操作一样,我们使用事务主要用于写操作的时候才会使用,查询的时候没有必要
创建事务
xxxxxxxxxxbool QSqlDatabase::transaction();提交事务
xxxxxxxxxxbool QSqkDatabase::commit();回滚事务
xxxxxxxxxxbool QSqkDatabase::rollback();例子如下:
xxxxxxxxxxQSqlQuery query;QString sql="update emp2 set age=100 where name='灭绝'";db.transaction();//开启事务bool flag=query.exec(sql);if(flag){db.commit();//提交事务}else{db.rollback();//回滚事务}
重写QChartView控件
主要是为了重写事件,然后我们的设计师模式下的控件也需要提升,QGraphicsView控件提升为我们重写过后的类
xxxxxxxxxxclass QWChartView : public QChartView{    Q_OBJECT
private:    QPoint  beginPoint; //选择矩形区的起点    QPoint  endPoint;  //选择矩形区的终点protected:    void mousePressEvent(QMouseEvent *event); //鼠标左键按下    void mouseMoveEvent(QMouseEvent *event); //鼠标移动    void mouseReleaseEvent(QMouseEvent *event); //鼠标释放左键    void keyPressEvent(QKeyEvent *event); //按键事件public:    explicit QWChartView(QWidget *parent = 0);    ~QWChartView();signals:    void mouseMovePoint(QPoint point); //鼠标移动信号,在mouseMoveEvent()事件中触发};
这是头文件,项目具体代码看samp9_4。
我们提一下这几个事件如下:
xxxxxxxxxxvoid QWChartView::mousePressEvent(QMouseEvent *event){//鼠标左键按下,记录beginPoint    if (event->button()==Qt::LeftButton)        beginPoint=event->pos();    QChartView::mousePressEvent(event);}void QWChartView::mouseMoveEvent(QMouseEvent *event){//鼠标移动事件    QPoint  point;    point=event->pos();
    emit mouseMovePoint(point);    QChartView::mouseMoveEvent(event);}void QWChartView::mouseReleaseEvent(QMouseEvent *event){    if (event->button()==Qt::LeftButton)    { //鼠标左键释放,获取矩形框的endPoint,进行缩放        endPoint=event->pos();        QRectF  rectF;        rectF.setTopLeft(this->beginPoint);        rectF.setBottomRight(this->endPoint);        this->chart()->zoomIn(rectF);    }    else if (event->button()==Qt::RightButton)        this->chart()->zoomReset(); //鼠标右键重置,resetZoom    QChartView::mouseReleaseEvent(event);}void QWChartView::keyPressEvent(QKeyEvent *event){//按键控制    switch (event->key()) {    case Qt::Key_Plus:  //+        chart()->zoom(1.2);        break;    case Qt::Key_Minus:        chart()->zoom(0.8);        break;    case Qt::Key_Left:        chart()->scroll(10, 0);        break;    case Qt::Key_Right:        chart()->scroll(-10, 0);        break;    case Qt::Key_Up:        chart()->scroll(0, -10);        break;    case Qt::Key_Down:        chart()->scroll(0, 10);        break;    case Qt::Key_PageUp:        chart()->scroll(0, 50);        break;    case Qt::Key_PageDown:        chart()->scroll(0, -50);        break;    case Qt::Key_Home:        chart()->zoomReset();        break;    default:        QGraphicsView::keyPressEvent(event);    }
给控件绘画渐变图像
我们这里给QPushButton也就是按钮绘画,如下:
xxxxxxxxxx QLinearGradient lgcolor1(0,0,100,0); lgcolor1.setColorAt(1.0,Qt::black); lgcolor1.setColorAt(0.67,Qt::blue); lgcolor1.setColorAt(0.33,Qt::red); lgcolor1.setColorAt(0.0,Qt::yellow); QPixmap pm(160,20); QPainter painter(&pm); painter.setBrush(lgcolor1); painter.drawRect(0,0,160,20); ui->btnGrad1->setIcon(QIcon(pm)); ui->btnGrad1->setIconSize(QSize(160,20));lgcolor1用来设置颜色即可,然后pm即图片对象,初始化大小即可,根据pm再创建painter绘图对象,绘图对象调用setBrush方法设置刷子也就是颜色,传入lgcolor1.然后开始绘画,前两个参数00表示从最坐上开始画。
然后即可把pm图片对象设置给按钮,记得调整大小。
同样我们也可以用类似的办法设置别的图片为当前按钮的大小
Sqlite使用指令
打开一个数据库文件,sqlite属于单击数据库,一个db文件就是一个数据库,如果数据库不存在就会在当前目录给我们创建
xxxxxxxxxx.open xxx.db列举当前目录所有的数据库即db文件
xxxxxxxxxx.databases列举当前数据库文件所有的表
xxxxxxxxxx.tables查询当前数据库下所有表的表结构
xxxxxxxxxxselect * from sqlite_master where type="table";插入语句
xxxxxxxxxxINSERT INTO employee (EmpNo,Name,Gender,Height,Birthday,Mobile,Province, City,Department,Education,Salary,Memo,Photo) VALUES(:EmpNo,:Name, :Gender,:Height,:Birthday,:Mobile,:Province, :City,:Department,:Education,:Salary,:Memo,:Photo)这里用到了类似占位的操作,先确定表,括号扩起字段,然后即可values()按道理里面直接写数据即可,但是我们写:加上字段名也就代理了
适用于多数数据库,DBeaver工具会显示下面这样:让我们输入值
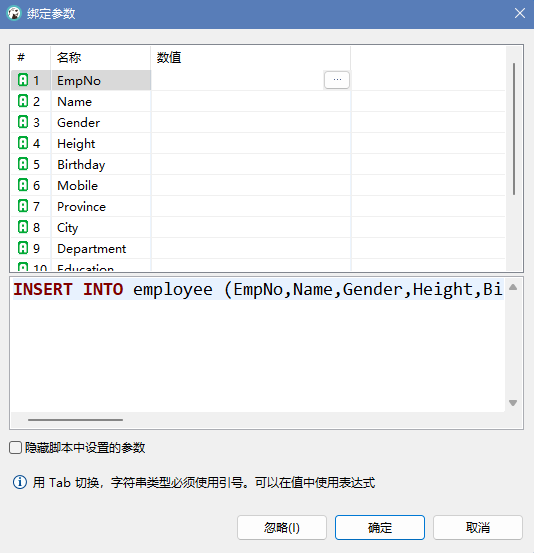
Qt有对应的处理的方式,如下:
xxxxxxxxxxvoid MainWindow::on_actRecInsert_triggered(){//插入记录    QSqlQuery query;    query.exec("select * from employee where EmpNo=-1");    QSqlRecord curRec=query.record();//返回包含当前查询的字段信息的QSqlRecord    curRec.setValue("EmpNo",qryModel->rowCount()+3000);
    DialogData*dataDlg=new DialogData;//创建对话框对象    Qt::WindowFlags flags=dataDlg->windowFlags();    dataDlg->setWindowFlags(flags|Qt::MSWindowsFixedSizeDialogHint);    dataDlg->setInserRecord(curRec);//设置对话框名字和第一个属性    int ret=dataDlg->exec();//模态显示    if(ret==QDialog::Accepted){        QSqlRecord recData=dataDlg->getRecordData();//获取包含对话框内所有属性的QSqlRecord对象        query.prepare("INSERT INTO employee (EmpNo,Name,Gender,Height,Birthday,Mobile,Province,"                      " City,Department,Education,Salary,Memo,Photo) "                      " VALUES(:EmpNo,:Name, :Gender,:Height,:Birthday,:Mobile,:Province,"                      " :City,:Department,:Education,:Salary,:Memo,:Photo)");//这是一个SQL的语法。下面是进行替换        //绑定然后替换,我们执行SQL全部都是用:开头的占位符,不是实际的数据插入,我们第二个参数则进行替换,实际上我们用QString然后拼接字符串是一样的效果        query.bindValue(":EmpNo",recData.value("EmpNo"));        query.bindValue(":Name",recData.value("Name"));        query.bindValue(":Gender",recData.value("Gender"));        query.bindValue(":Height",recData.value("Height"));        query.bindValue(":Birthday",recData.value("Birthday"));        query.bindValue(":Mobile",recData.value("Mobile"));        query.bindValue(":Province",recData.value("Province"));        query.bindValue(":City",recData.value("City"));        query.bindValue(":Department",recData.value("Department"));        query.bindValue(":Education",recData.value("Education"));        query.bindValue(":Salary",recData.value("Salary"));        query.bindValue(":Memo",recData.value("Memo"));        query.bindValue(":Photo",recData.value("Photo"));        if(!query.exec())            QMessageBox::critical(this,"error","information:"+query.lastError().text());        else{//重新显示插入后的数据,重新查询            qryModel->setQuery("SELECT empNo, Name, Gender, Height, Birthday, Mobile, Province, City, Department, "                               " Education, Salary FROM employee order by empNo");        }    }}
QComboBox设置
在Qt6,设置QComboBox下拉控件是否可编辑使用setEditable(true);方法,传入true,默认false
Qt的SQL模块
首先得在pro文件加上
xxxxxxxxxxQt += sql
QsqlTableModel的使用
它和之前QTabeView控件的QStandardItemModel数据模型有很大的相似,它们都得用来设置QTabView控件显示数据,但我们的QsqlTableModel数据模型不再需要设置行和列,它对sql封装的非常的好。乃至于我们只需要把它放入控件,设置table,即可打开sqlite数据库文件直接显示,不需要任何设置。
我们简单点说先:
xxxxxxxxxx QSqlDatabase DB;//数据库对象 QSqlTableModel*tabModel;//数据模型 QItemSelectionModel*theSelection;//选择模型起码我们需要这三个对象,然后设置打开按钮
xxxxxxxxxxvoid MainWindow::on_actOpenDB_triggered(){//加载数据库文件 QString aFile=QFileDialog::getOpenFileName(this,"选择数据库文件","","SQLite数据库(*.db *.db3)");//第三个参数是打开到的路径,省缺就会打开同级目录 if(aFile.isEmpty())return; DB=QSqlDatabase::addDatabase("QSQLITE");//添加驱动,不同数据库不同 DB.setDatabaseName(aFile);//设置数据库文件 if(!DB.open()){ QMessageBox::warning(this,"错误","打开数据库失败"); return; } openTable();//调用函数}挺简单的,我们看函数,我们去掉很多设置,只需要看数据库和显示的操作
xxxxxxxxxxvoid MainWindow::openTable(){//打开表格 tabModel=new QSqlTableModel(this,DB); tabModel->setTable("employee");//数据表格 tabModel->setSort(tabModel->fieldIndex("EmpNo"),Qt::AscendingOrder);//第一个字段 tabModel->setEditStrategy(QSqlTableModel::OnManualSubmit); if(!tabModel->select()){ QMessageBox::critical(this,"错误","打开数据库错误,错误信息\n"+tabModel->lastError().text()); return; } //tabModel->setHeaderData(tabModel->fieldIndex("EmpNo"),Qt::Horizontal,"工号");//设置第一行index为"EmpNo"的字段为中文的工号 theSelection=new QItemSelectionModel(tabModel);//给选择模型实例化的同时绑定数据模型 ui->tableView->setModel(tabModel);//设置数据模型 ui->tableView->setSelectionModel(theSelection); //设置选择模型}我们可以随意修改数据库表格的名字来打开不同的数据库.db或.db3文件,同时注意修改fieldIdex。我们可以看到我们没有任何显示设置。就是如此单纯。tabModel还有很多很多的方法可以调用,这个项目的代码和实现可以看书。
类头文件如下:
xxxxxxxxxxclass MainWindow : public QMainWindow{ Q_OBJECT
private: QSqlDatabase DB;//数据库连接
QSqlTableModel *tabModel; //数据模型
QItemSelectionModel *theSelection; //选择模型
QDataWidgetMapper *dataMapper; //数据映射
QWComboBoxDelegate delegateSex; //自定义数据代理,性别 QWComboBoxDelegate delegateDepart; //自定义数据代理,部门
void openTable();//打开数据表 void getFieldNames();//获取字段名称,填充“排序字段”的comboBoxpublic: explicit MainWindow(QWidget *parent = 0); ~MainWindow();private slots: void on_currentChanged(const QModelIndex ¤t, const QModelIndex &previous);// QTableView的SelectionModel的行发生了变化,进行处理 void on_currentRowChanged(const QModelIndex ¤t, const QModelIndex &previous);/////////////////////// void on_actOpenDB_triggered();
void on_actRecAppend_triggered();
void on_actRecInsert_triggered();
void on_actRevert_triggered();
void on_actSubmit_triggered();
void on_actRecDelete_triggered();
void on_actPhoto_triggered();
void on_actPhotoClear_triggered();
void on_radioBtnAscend_clicked();
void on_radioBtnDescend_clicked();
void on_radioBtnMan_clicked();
void on_radioBtnWoman_clicked();
void on_radioBtnBoth_clicked();
void on_comboFields_currentIndexChanged(int index);
void on_actScan_triggered();private: Ui::MainWindow *ui;};下面是一些方法的使用
x
void MainWindow::on_actRecInsert_triggered(){//插入记录 QModelIndex curIndex=ui->tableView->currentIndex();
tabModel->insertRow(curIndex.row(),QModelIndex());
theSelection->clearSelection();//清除已有选择 theSelection->setCurrentIndex(curIndex,QItemSelectionModel::Select);}void MainWindow::on_actRevert_triggered(){//取消修改 tabModel->revertAll(); ui->actSubmit->setEnabled(false); ui->actRevert->setEnabled(false);}void MainWindow::on_actSubmit_triggered(){//保存修改 bool res=tabModel->submitAll();
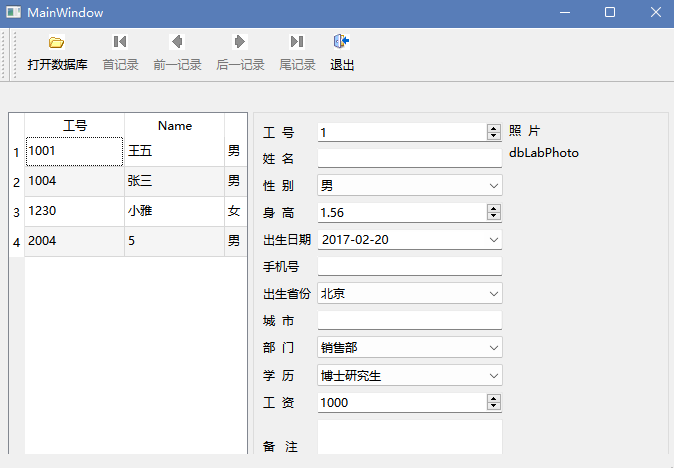
if (!res) QMessageBox::information(this, "消息", "数据保存错误,错误信息\n"+tabModel->lastError().text(), QMessageBox::Ok,QMessageBox::NoButton); else { ui->actSubmit->setEnabled(false); ui->actRevert->setEnabled(false); }}void MainWindow::on_actRecDelete_triggered(){//删除当前记录 QModelIndex curIndex=theSelection->currentIndex();//获取当前选择单元格的模型索引 tabModel->removeRow(curIndex.row()); //删除最后一行}void MainWindow::on_actPhoto_triggered(){//设置照片 QString aFile=QFileDialog::getOpenFileName(this,"选择图片文件","","照片(*.jpg)"); if (aFile.isEmpty()) return;
QByteArray data; QFile* file=new QFile(aFile); //fileName为二进制数据文件名 file->open(QIODevice::ReadOnly); data = file->readAll(); file->close();
int curRecNo=theSelection->currentIndex().row(); QSqlRecord curRec=tabModel->record(curRecNo); //获取当前记录 curRec.setValue("Photo",data); //设置字段数据 tabModel->setRecord(curRecNo,curRec);
QPixmap pic; pic.load(aFile); //在界面上显示 ui->dbLabPhoto->setPixmap(pic.scaledToWidth(ui->dbLabPhoto->width()));}void MainWindow::on_actPhotoClear_triggered(){ int curRecNo=theSelection->currentIndex().row(); QSqlRecord curRec=tabModel->record(curRecNo); //获取当前记录
curRec.setNull("Photo");//设置为空值 tabModel->setRecord(curRecNo,curRec);
ui->dbLabPhoto->clear();}void MainWindow::on_radioBtnAscend_clicked(){//升序 tabModel->setSort(ui->comboFields->currentIndex(),Qt::AscendingOrder); tabModel->select();}void MainWindow::on_radioBtnDescend_clicked(){//降序 tabModel->setSort(ui->comboFields->currentIndex(),Qt::DescendingOrder); tabModel->select();}void MainWindow::on_radioBtnMan_clicked(){ tabModel->setFilter(" Gender='男' ");// tabModel->select();}void MainWindow::on_radioBtnWoman_clicked(){ tabModel->setFilter(" Gender='女' ");// tabModel->select();}void MainWindow::on_radioBtnBoth_clicked(){//所有 tabModel->setFilter("");}void MainWindow::on_comboFields_currentIndexChanged(int index){//选择字段进行排序 if (ui->radioBtnAscend->isChecked()) tabModel->setSort(index,Qt::AscendingOrder); else tabModel->setSort(index,Qt::DescendingOrder);
}void MainWindow::on_actScan_triggered(){//涨工资,记录遍历 if (tabModel->rowCount()==0) return;
for (int i=0;i<tabModel->rowCount();i++) { QSqlRecord aRec=tabModel->record(i); //获取当前记录 float salary=aRec.value("Salary").toFloat(); salary=salary*1.1; aRec.setValue("Salary",salary); tabModel->setRecord(i,aRec); } if (tabModel->submitAll()) QMessageBox::information(this, "消息", "涨工资计算完毕", QMessageBox::Ok,QMessageBox::NoButton);}
下面是切换行发出信号时执行的代码:
xxxxxxxxxxvoid MainWindow::on_currentRowChanged(const QModelIndex ¤t, const QModelIndex &previous){ Q_UNUSED(previous);// 行切换时的状态控制 ui->actRecDelete->setEnabled(current.isValid()); ui->actPhoto->setEnabled(current.isValid()); ui->actPhotoClear->setEnabled(current.isValid());
if (!current.isValid()) { ui->dbLabPhoto->clear(); //清除图片显示 return; }
dataMapper->setCurrentIndex(current.row()); //更细数据映射的行号
int curRecNo=current.row();//获取行号 QSqlRecord curRec=tabModel->record(curRecNo); //获取当前记录
if (curRec.isNull("Photo")) //图片字段内容为空 ui->dbLabPhoto->clear(); else { QByteArray data=curRec.value("Photo").toByteArray(); QPixmap pic; pic.loadFromData(data); ui->dbLabPhoto->setPixmap(pic.scaledToWidth(ui->dbLabPhoto->size().width())); }}
QSQLQueryModel的使用
QSQLQueryModel是QSQLTab额Model的父类
QSQLQueryModel封装了指向SELECT语句从数据库查询数据的功能
QSqlQueryModel只能读取数据,不能编辑
先简单的让它显示数据库的内容,头文件:
xxxxxxxxxx QSqlDatabase DB;//数据库对象 QSqlQueryModel*qryModel;//数据模型 QItemSelectionModel*theSelection;//选择模型构造函数 非常普通简单
xxxxxxxxxx qryModel=new QSqlQueryModel(this); theSelection=new QItemSelectionModel(qryModel); ui->tableView->setModel(qryModel);//设置数据模型 ui->tableView->setSelectionModel(theSelection);//设置选择模型打开数据库的按钮:
xxxxxxxxxxvoid MainWindow::on_actOpenDB_triggered(){//打开 QString aFile=QFileDialog::getOpenFileName(this,"打开数据库","","数据库文件(*.db *.db3)"); if(aFile.isEmpty())return; DB=QSqlDatabase::addDatabase("QSQLITE"); DB.setDatabaseName(aFile); if(!DB.open()){ QMessageBox::warning(this,"错误","打开数据库失败"); return; } qryModel->setQuery("SELECT empNo, Name, Gender, Height, Birthday, Mobile, Province, City, Department, " " Education, Salary FROM employee ORDER BY empNo");//sql查询语句 if(qryModel->lastError().isValid()){ QMessageBox::critical(this,"错误","数据库","查询失败\n"+qryModel->lastError().text()); return; } qryModel->setHeaderData(0,Qt::Horizontal,"工号");//设置第0和第二个字段的名称 qryModel->setHeaderData(2,Qt::Horizontal,"性别");}执行完毕后,其实和之前的界面一样的,主要在于这个我们无法修改了,没办法编辑
void QTableView:: setColumnHidden ( int column , bool hide )
如果hide为真,则给定列将被隐藏;否则将显示。
只有QSqlTableModel作为数据模型才有效,用于隐藏或者重写显示列的。隐藏列不影响读取它的数据。
QDataWidgetMapper是数据映射,值得注意
我们放两个函数,分别是打开和切换行的时候的函数,主要是为了看它的对数据库和一些类的方法使用
xxxxxxxxxxvoid MainWindow::on_actOpenDB_triggered(){//打开 QString aFile=QFileDialog::getOpenFileName(this,"打开数据库","","数据库文件(*.db *.db3)"); if(aFile.isEmpty())return; DB=QSqlDatabase::addDatabase("QSQLITE"); DB.setDatabaseName(aFile); if(!DB.open()){ QMessageBox::warning(this,"错误","打开数据库失败"); return; } qryModel->setQuery("SELECT empNo, Name, Gender, Height, Birthday, Mobile, Province, City, Department, " " Education, Salary FROM employee ORDER BY empNo");//准备SQL语句 if(qryModel->lastError().isValid()){ QMessageBox::critical(this,"错误","数据库","查询失败\n"+qryModel->lastError().text()); return; } qryModel->setHeaderData(0,Qt::Horizontal,"工号");//设置第0和第二个字段的名称 qryModel->setHeaderData(2,Qt::Horizontal,"性别");
dataMapper->addMapping(ui->dbSpinEmpNo,0);//在小部件和模型中的部分之间添加映射 dataMapper->addMapping(ui->dbEditName,1); //dataMapper->toFirst();//设置第一行映射 ui->actOpenDB->setEnabled(false);}void MainWindow::on_currentRowChanged(const QModelIndex ¤t, const QModelIndex &previous){//行切换的时候触发此信号 if(!current.isValid()){ ui->dbLabPhoto->clear(); return ; } dataMapper->setCurrentModelIndex(current);//设置为当前所在的行,为了映射 bool first=(current.row()==0);//是否首记录 bool last=(current.row()==qryModel->rowCount()-1);
ui->actRecFirst->setEnabled(!first);//更新状态 ui->actRecPrevious->setEnabled(!first); ui->actRecNext->setEnabled(!last); ui->actRecLast->setEnabled(!last);
int curRecNo=theSelection->currentIndex().row(); QSqlRecord curRec=qryModel->record(curRecNo);//获取当前状态 int empNo=curRec.value("EmpNo").toInt(); QSqlQuery query;//查询当前empNo的Memo和Photo字段的数据 query.prepare("select EmpNo,Memo,Photo from employee where EmpNo=:ID");//准备SQL语句 query.bindValue(":ID",empNo);//将占位符占位符设置为绑定到准备好的语句中的值val query.exec(); query.first();//回到第一条record QVariant va=query.value("Photo");//获取查询到的Photo字段的value if(!va.isValid())//图片字段内容为空则: ui->dbLabPhoto->clear(); else{//反之显示照片: QPixmap pic; QByteArray data=va.toByteArray(); pic.loadFromData(data); ui->dbLabPhoto->setPixmap(pic.scaledToHeight(ui->dbLabPhoto->size().width())); } QVariant va2=query.value("Memo");//获取查询到的Memo字段的value ui->dbEditMemo->setPlainText(va2.toString());//将数据显示到控件中}我们可以看到,与QsqlTableModel的不同是我们QSqlQueryModel的打开需要准备SQL查询语句才能显示,需要调用setQuery方法
删除当前记录:
xxxxxxxxxxvoid MainWindow::on_actRecDelete_triggered(){//删除当前记录    int curRecNo=theSelection->currentIndex().row();    QSqlRecord  curRec=qryModel->record(curRecNo); //获取当前记录    if (curRec.isEmpty()) //当前为空记录        return;
    int empNo=curRec.value("EmpNo").toInt();//获取员工编号    QSqlQuery query;    query.prepare("delete  from employee where EmpNo = :ID");    query.bindValue(":ID",empNo);
    if (!query.exec())        QMessageBox::critical(this, "错误", "删除记录出现错误\n"+query.lastError().text(),                                 QMessageBox::Ok,QMessageBox::NoButton);    else //插入,删除记录后需要重新设置SQL语句查询    {        QString sqlStr=qryModel->query().executedQuery();//  执行过的SELECT语句        qryModel->setQuery(sqlStr);         //重新查询数据    }}
遍历,涨工资:
xxxxxxxxxxvoid MainWindow::on_actScan_triggered(){//涨工资    QSqlQuery qryEmList;    qryEmList.exec("SELECT EmpNo,Salary FROM employee order by EmpNo");    qryEmList.first();    QSqlQuery qryUpdate;    qryUpdate.prepare("UPDATE employee SET Salary=:Salary Where EmpNo= :ID");
    while(qryEmList.isValid()){        int empID=qryEmList.value("EmpNo").toInt();        float salary=qryEmList.value("Salary").toFloat();        salary+=1000;        qryUpdate.bindValue(":ID",empID);        qryUpdate.bindValue(":Salary",salary);        qryUpdate.exec();//执行        if(qryUpdate.lastError().isValid())return;        if(!qryEmList.next())break;    }    qryModel->setQuery("SELECT empNo, Name, Gender, Height, Birthday, Mobile, Province, City, Department, "                       " Education, Salary FROM employee order by empNo");    QMessageBox::information(this,"提示","涨工资完毕");}
我们可以看到Sql语句这种占位的方式用的非常多。另外我们这里使用的是Samp11_3的项目,最前面那个是2的
QSqlRelationalTableModel的使用
该类为单表提供了一个可编辑的数据模型,它支持外键
打开数据库:
xxxxxxxxxxvoid MainWindow::on_actOpenDB_triggered(){//打开 QString aFile=QFileDialog::getOpenFileName(this,"打开数据库","","SQLITE数据(*.db *db3)"); if(aFile.isEmpty())return; DB=QSqlDatabase::addDatabase("QSQLITE"); DB.setDatabaseName(aFile); if(!DB.open()){ QMessageBox::warning(this,"error","打开数据库失败"); } //设置数据与选择模型 tabModel=new QSqlRelationalTableModel(this,DB); tabModel->setTable("studInfo");//设置表名 tabModel->setEditStrategy(QSqlTableModel::OnManualSubmit); tabModel->setSort(0,Qt::AscendingOrder);//设置排序 tabModel->setHeaderData(0,Qt::Horizontal,"学号");//分别更改五列的字段 tabModel->setHeaderData(1,Qt::Horizontal,"姓名"); tabModel->setHeaderData(2,Qt::Horizontal,"性别"); tabModel->setHeaderData(3,Qt::Horizontal,"学院"); tabModel->setHeaderData(4,Qt::Horizontal,"专业"); theSelection=new QItemSelectionModel(tabModel); ui->tableView->setModel(tabModel); ui->tableView->setSelectionModel(theSelection); tabModel->select();//使用指定的过滤器和排序条件,使用通过setTable ()设置的表中的数据填充模型}重点:我们要让它像外键一样,同时还能下拉:
xxxxxxxxxx//设置代码字段的查询关系数据表,这两句代码第一个参数是表,第二个参数是字段,第三个参数是第一个参数表的需要替换的值,根据第二个参数让主表和从表进行匹配,然后第三个参数进行替换 tabModel->setRelation(3,QSqlRelation("departments","departID","department")); //学院 tabModel->setRelation(4,QSqlRelation("majors","majorID","major"));//专业 ui->tableView->setItemDelegate(new QSqlRelationalDelegate(ui->tableView));前面两行设置的是外键,第三行设置的是下拉列表:如果不设置:
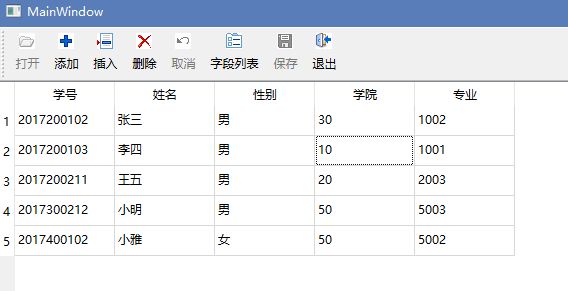
只设置两行:
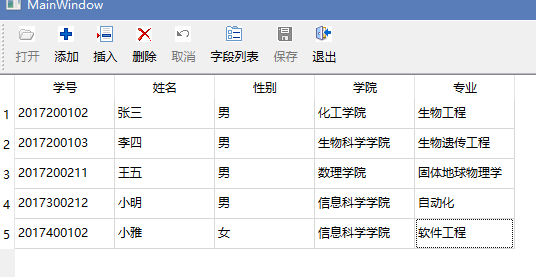
全部设置好:
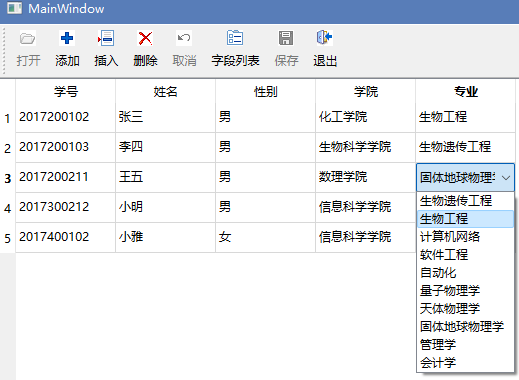
遍历字段:
xxxxxxxxxxvoid MainWindow::on_actFields_triggered(){//字段列表 QSqlRecord emptyRec=tabModel->record(); QString str=nullptr; for(int i=0;i<emptyRec.count();i++){ str=str+emptyRec.fieldName(i)+' ';//返回位置index的字段名称 累加 } QMessageBox::information(this,"所有字段名称",str);}项目例子是Samp11_4,其他函数不再介绍
自定义Qt Designer插件
.......看视频吧
Qt编译静态库且使用
我们要创建library项目
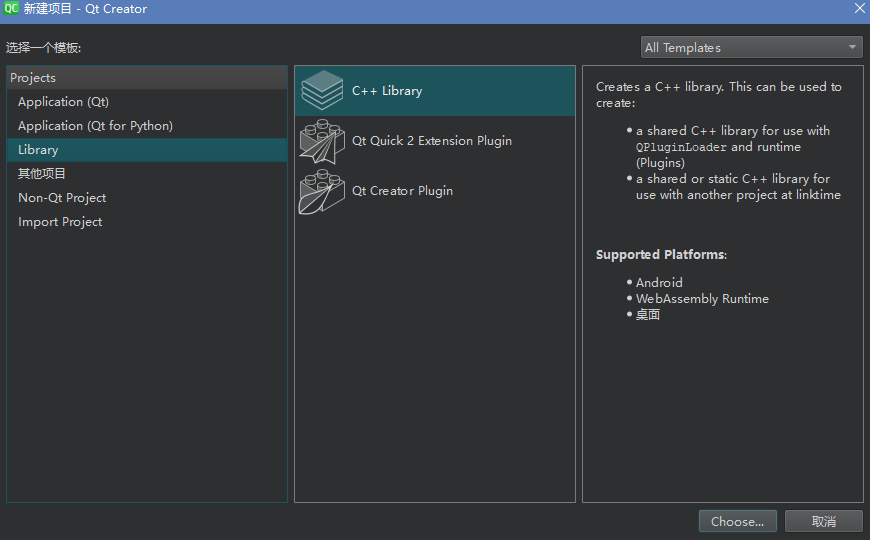
然后选择静态库,默认是动态库,如下:
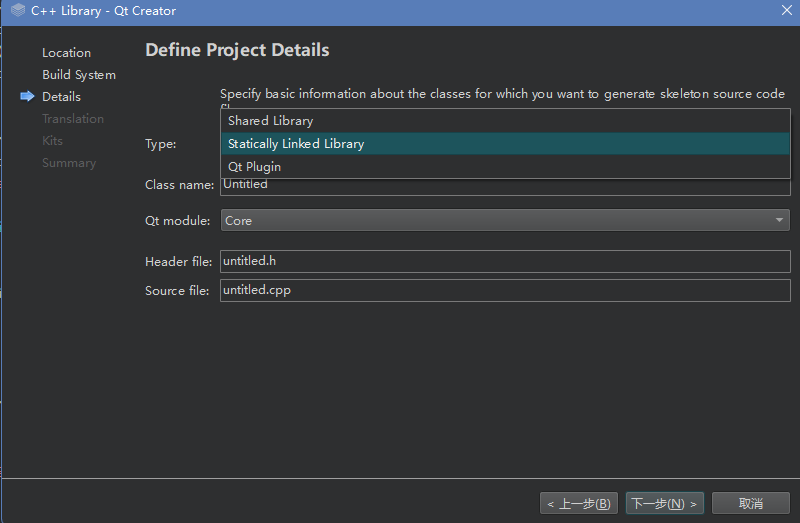
我们这里使用在Samp9_3写的控件选择pen,需要复制一个h文件,一个cpp,一个ui,导入到项目即可编译。注意pro项目设置,默认少模块,自己加。如果使用的是gcc编译器后缀名就是a,正常现象。然后我们创建一个include文件夹,记得把头文件加进来:

最后这个d是我们自己加的,这很重要,因为在别的项目导入它的时候导入加,我们是debug生成的,点击项目右键添加库:
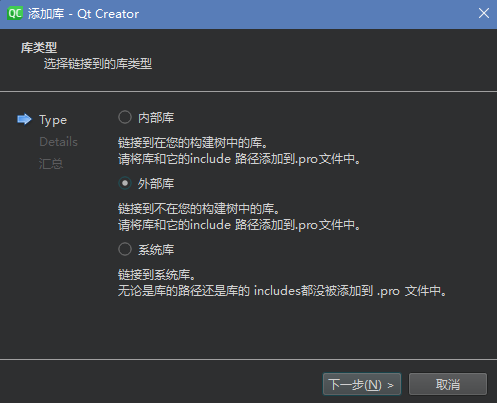
下一步:
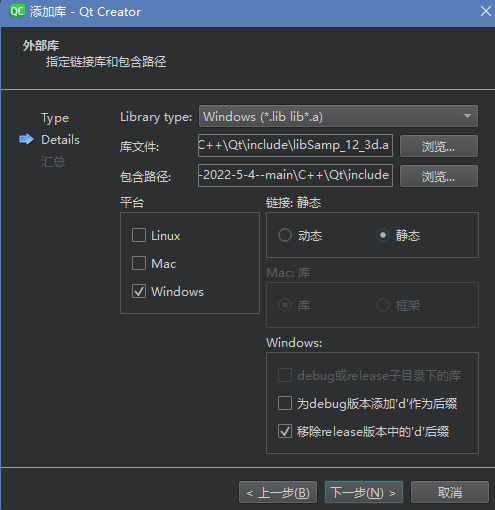
自己选择好即可下一步结束,include引入头文件就能直接使用,编译静态库和使用的方式都大同小异,只是设置项目的不同ide不同而已。
创建和使用共享库
基本的创建和导入和上面的静态是一样的,设置改成动态库即可,不介绍。讲不同的
注意编译好后我们需要一个静态库一个动态库,静态库类似辅助动态库的,因为使用gcc编译后缀名是a,如下:

但是现在是无效的,我们创建DLL项目除了一个头文件一个cpp,还会有一个xxx_global.h它需要被使用
需要在编译的h文件引入它,同时使用它的宏加在类名前面
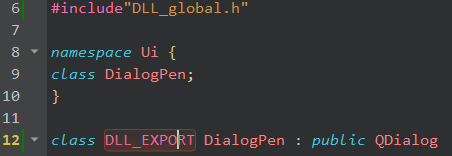
我们需要四个文件:
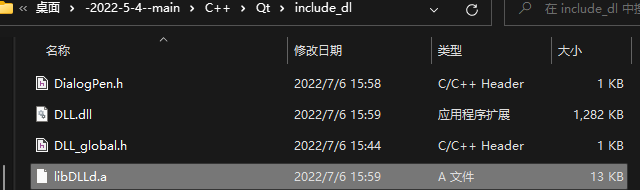
注意是debug生成的要在最后加d。
然后正常添加库,使用动态库,但选择的时候选择这个a后缀的静态。就好了。但是

我们看到项目生成的代码实际上是把include_dl也当成搜索目录了。这个目录文件夹和项目所在的文件夹是同级。最好是我们把dll拷贝到生成的dll同级目录
接下来我们看如何显式调用动态库,编译时无序动态库的任何文件
xxxxxxxxxxvoid MainWindow::on_pushButton_clicked(){//调用Dephi DLL QLibrary myLib("Qt_Dll"); if (myLib.isLoaded())//加载 QMessageBox::information(this,"信息","Qt_Dll.dll已经被载入,第1处"); typedef int(*FunDef)(int); //函数原定定义 FunDef myTriple = (FunDef) myLib.resolve("?n_3@@YAHH@Z"); //解析DLL中的函数 int V=myTriple(ui->spinInput->value()); //调用函数 ui->spinOutput->setValue(V);//显示 if (myLib.isLoaded()) QMessageBox::information(this,"信息","DelphiDLL.DLL已经被载入,第2处");}为啥这个函数名这么奇怪?因为这是一种比较粗暴的解决的方式
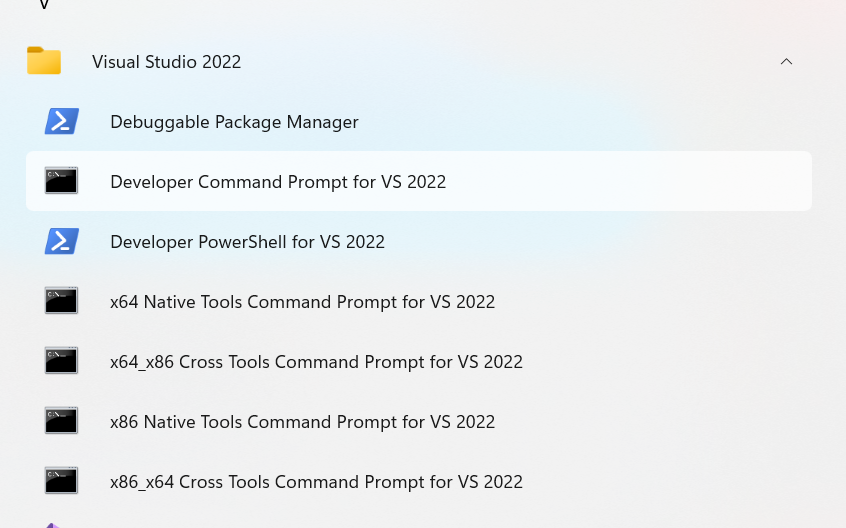
输入:dumpbin /exports dll路径
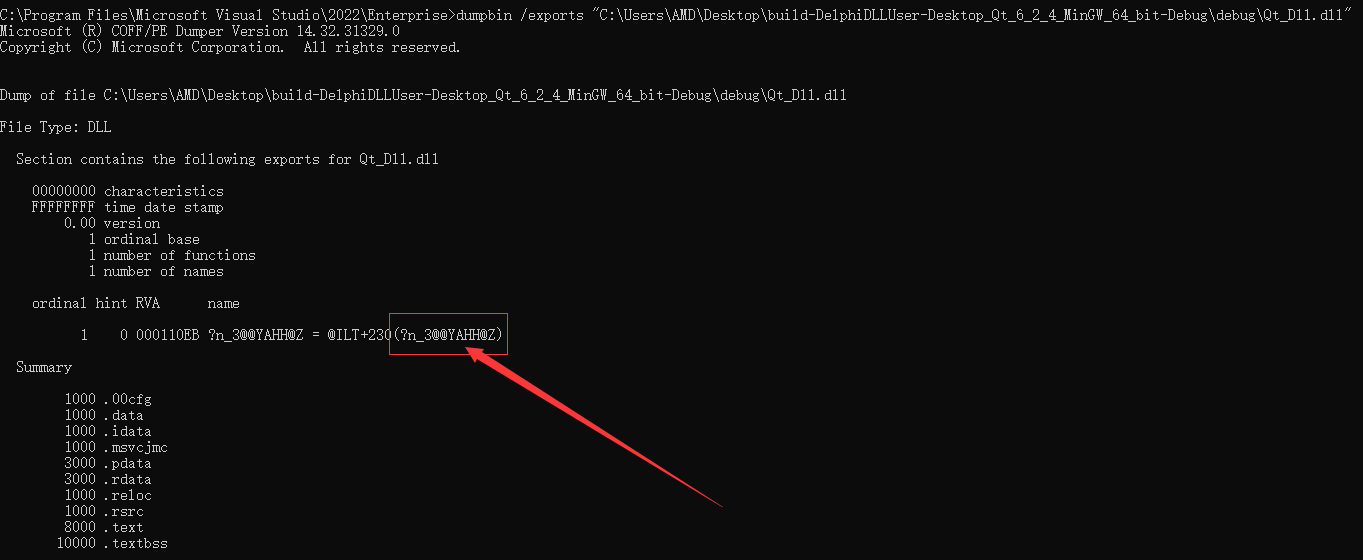
就解决了,虽然有点傻
我们回忆一下vs生成dll吧,结果如下:

标准的显式链接调用,这里只是封装一个函数,头文件写:
xxxxxxxxxxextern __declspec(dllexport) int n_3(int n);cpp:
xxxxxxxxxxint n_3(int n) { return n * 3;}类的话也只需要声明的时候类名前面加上extern __declspec(dllexport)即可
这种可以直接用于隐式链接调用共享库
用模块定义文件(.def)解决函数名的问题
首先我们不需要再写extern __declspec(dllexport) 了
创建一个*.def文件
xxxxxxxxxxLIBRARY Qt_DLL//第一个必须写,表示和dll关联,第二个是生成的dll的名字EXPORTS//必写 n_3//函数名xxxxxxxxxx//函数完整的语法是EXPORTS 函数标识符 = 导出名还要设置项目的连接器属性,不然项目不知道。这种方式对类无效
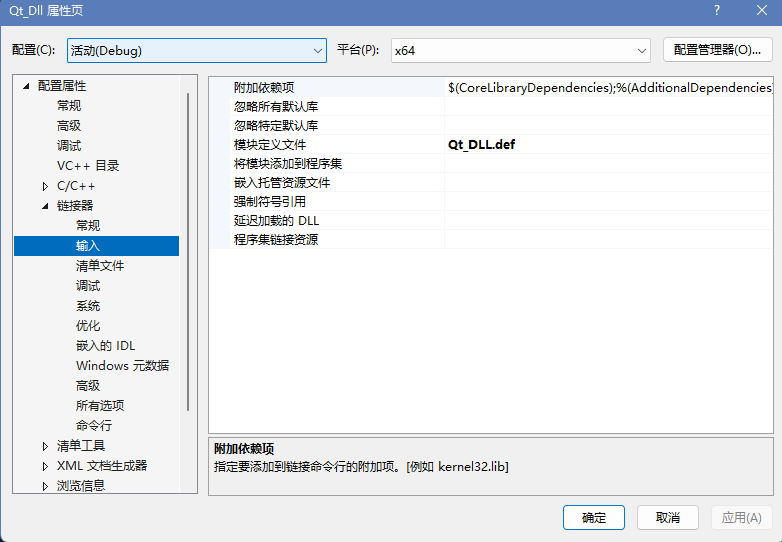
ABI
ABI(应用程序二进制接口)
API和ABI
API,Application Programming Interface
ABI,Application Binary Interface
从名字上就可以看出,API是面向编程人员的,是面向人的;而ABI,编程人员是不容易直接看到的,但编程人员的行为可以直接影响到ABI,简单来说,ABI是面向编译器的。举个简单的例子
详细看文章
Qt互斥量,线程同步
QThread之前介绍过了,不再说明。
xxxxxxxxxx //QMutex是Qt提供的互斥量,类似std::mutex lock() unlock() trylock()//三种常用的方法 //QMutexLocker简化了互斥量的处理,利用的RAII,构造与析构进行互斥量的操作 std::lock_guard<std::mutex>//类似于这个,创建它的时候需要传入一个互斥量进行构造 //Qt必须传入互斥量地址,标准库使用的是引用 QMutexLocker<QMutex>T(&c);//实际就是一个包装器
Qt的基于QReadWriteLock的线程同步
x
//QReadWriteLock提供以下几个主要的函数:lockForRead()//:只读方式锁定资源,如果有其他线程以写入方式锁定,这个函数会阻塞lockForWrite()//:以写入方式锁定资源,如果本线程或其他线程以读或写模式锁定资源,则函数堵塞unlock()//:解锁tryLockForRead()//:是lockForRead的非阻塞版本tryLockForWrite()//:是lockForWrite的非阻塞版本QReadLocker和QWriteLocker是QReadWriteLock的简便形式,无需与unlock()配对使用
他们用的是RAII自动的,所有不用手动unlock()
QReadWriteLock 不是包装器,它本身就是锁,不需要传入QMutex进行构造
Qt的QWaitCondition线程同步
xxxxxxxxxx//QWaitCondition提供如下一些函数wait(QMutex*lockedMutex)//进入等待状态,解锁互斥量lockedMutex,被唤醒后锁定lockedMutex并退出函数wakeAll()//唤醒所有处于等待状态的线程,线程唤醒的顺序不确定,由操作系统的调度策略决定wakeOne()//唤醒一个处于等待状态的线程,唤醒哪个线程不确定,由操作系统的调度策略QWaitCondition 一般用于 “ 生产者/消费者 ” ( producer/consumer )模型中 。“ 生产者”产生数据, “ 消费者 ” 使用数据
它既不是锁也不是包装器,类似std::condition_variable
Qt基于信号量的线程同步QSemaphore
xxxxxxxxxx//QSemaphore是实现信号量功能的类,提供以下函数:acquire(int n)//:尝试获得n个资源,如果不够将堵塞线程,直到n个资源可用;release(int n)//:释放资源,如果资源已经全部可用,则可扩充资源总数;int available()//:返回当前信号量的资源个数;bool tryAcquire(int n=1)//:尝试获取n个资源,不成功时,不阻塞线程;信号量(Semaphore)通常用于保护一定的相同的资源,例如数Data Acquisition (数据采集)时的双缓冲数量区。
网络编程
其实之前讲过一些,我们详细讲一下,首先项目文件导入网络模块
xxxxxxxxxxQT += network
获取IPv4地址与主机名显示:
x
void Dialog::on_btnGetHostInfo_clicked(){//主机名 QString hostName=QHostInfo::localHostName();//获取主机名 ui->plainTextEdit->appendPlainText(hostName);//显示主机名 QHostInfo hostInfo=QHostInfo::fromName(hostName);//获取主机信息
QList<QHostAddress>addList=hostInfo.addresses();//返回与hostName()关联的IP地址列表 保存 if(addList.isEmpty())return;//列表为空则退出 bool show; foreach (auto aHost, addList) {//foreach遍历只是为了找到列表中IPv4的属性 if(ui->chkOnlyIPv4->isChecked()) show=aHost.protocol()==QAbstractSocket::IPv4Protocol;//protocol()返回主机地址的网络层协议,进行比较 else show=true; if(show){//当show为true也就是找到IPv4的时候进行显示 ui->plainTextEdit->appendPlainText("协议:"+protocolName(aHost.protocol())); ui->plainTextEdit->appendPlainText("本机IP地址:"+aHost.toString()+"\n"); } }}QString Dialog::protocolName(QAbstractSocket::NetworkLayerProtocol protocoal){ switch(protocoal){ case QAbstractSocket::IPv4Protocol: return "IPv4 protocol"; case QAbstractSocket::IPv6Protocol: return "IPv6 protocol"; case QAbstractSocket::AnyIPProtocol: return "Any IP protocol"; default: return "Unknown Network Layer Protocol"; }}如果想要不同的协议也可以稍加修改枚举量
查找域名的方式获取IP地址:
int QHostInfo:: lookupHost (const QString & name , QObject * receiver , const char * member )[static]
查找与主机名name关联的 IP 地址,并返回用于查找的 ID。当查找结果准备好时,接收器中的插槽或信号成员将使用QHostInfo参数调用。然后可以检查QHostInfo对象以获取查找结果。
查找由单个函数调用执行,例如:
QHostInfo :: lookupHost( "www.kde.org" , this , SLOT(lookup( QHostInfo )));我们的例子如下:
x
void Dialog::on_btnLookup_clicked(){//查找域名的ip地址 QString hostname=ui->editHost->text(); ui->plainTextEdit->appendPlainText("正在查询的主机信息"+hostname); QHostInfo::lookupHost(hostname,this,SLOT(lookedUpHostInfo(QHostInfo)));}void Dialog::lookedUpHostInfo(const QHostInfo &host){ QList<QHostAddress> addList=host.addresses(); if(addList.isEmpty())return;//列表为空则退出 bool show; foreach (auto aHost, addList) {//foreach遍历只是为了找到列表中IPv4的属性 if(ui->chkOnlyIPv4->isChecked()) show=aHost.protocol()==QAbstractSocket::IPv4Protocol;//protocol()返回主机地址的网络层协议,进行比较 else show=true; if(show){//当show为true也就是找到IPv4的时候进行显示 ui->plainTextEdit->appendPlainText("协议:"+protocolName(aHost.protocol())); ui->plainTextEdit->appendPlainText("地址:"+aHost.toString()+"\n"); } }}lookupHost静态函数调用的我们写的函数和先前的差不多,都是查询主机IPv4地址的。我们是写成两个按钮,如下:
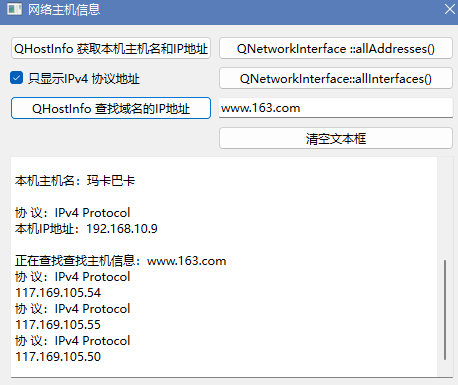
QNetworkInterface 类提供主机 IP 地址和网络接口的列表。
[static]QList < QHostAddress > QNetworkInterface:: allAddresses ()
此便捷函数返回在主机上找到的所有 IP 地址。这相当于对allInterfaces ()返回的所有处于QNetworkInterface::IsUp状态的对象调用addressEntries ()以获取QNetworkAddressEntry对象的列表,然后对每个对象调用QNetworkAddressEntry::ip ()。
也就是图右侧第一个按钮,实现代码如下:
void Dialog::on_btnDetail_clicked(){ QList<QHostAddress> addList=QNetworkInterface::allAddresses(); if(addList.isEmpty())return;//列表为空则退出 bool show; foreach (auto aHost, addList) {//foreach遍历只是为了找到列表中IPv4的属性 if(ui->chkOnlyIPv4->isChecked()) show=aHost.protocol()==QAbstractSocket::IPv4Protocol;//protocol()返回主机地址的网络层协议,进行比较 else show=true; if(show){//当show为true也就是找到IPv4的时候进行显示 ui->plainTextEdit->appendPlainText("协议:"+protocolName(aHost.protocol())); ui->plainTextEdit->appendPlainText("地址:"+aHost.toString()+"\n"); } }}只需要看函数内第一句话就行,其他的和前面的代码如出一辙
[static]QList < QNetworkInterface >QNetworkInterface:: allInterfaces ()
返回主机上找到的所有网络接口的列表。如果失败,它会返回一个包含零元素的列表。
最后一个按钮的例子:
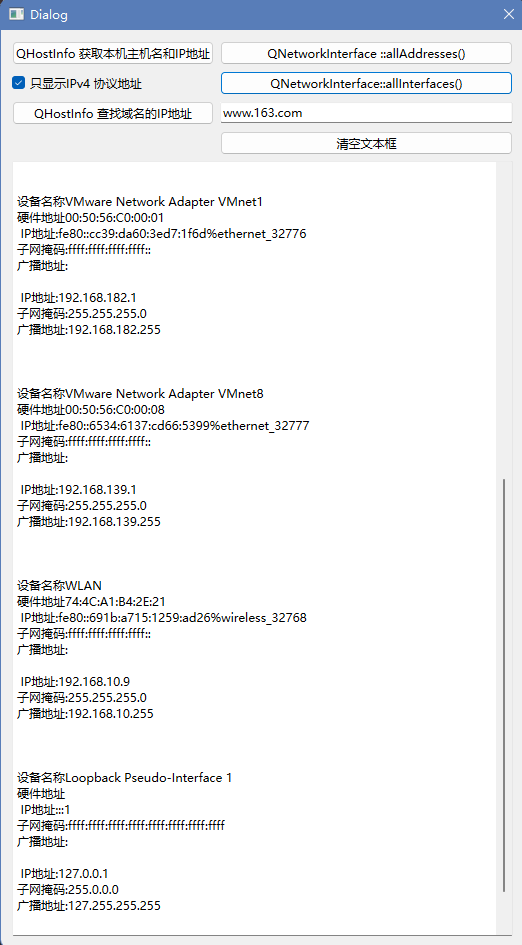
实现代码如下:
xxxxxxxxxxvoid Dialog::on_btnALLInterface_clicked(){ QList<QNetworkInterface>list=QNetworkInterface::allInterfaces(); foreach(auto aInterface,list){ if(!aInterface.isValid())continue; ui->plainTextEdit->appendPlainText("设备名称"+aInterface.humanReadableName()); ui->plainTextEdit->appendPlainText("硬件地址"+aInterface.hardwareAddress()); QList<QNetworkAddressEntry>entryList=aInterface.addressEntries(); foreach (auto aEntry, entryList) { ui->plainTextEdit->appendPlainText(" IP地址:"+aEntry.ip().toString()); ui->plainTextEdit->appendPlainText("子网掩码:"+aEntry.netmask().toString()); ui->plainTextEdit->appendPlainText("广播地址:"+aEntry.broadcast().toString()+"\n"); } ui->plainTextEdit->appendPlainText("\n"); }}